Category Archive Guide

Byjacquelyn

phil shoemaker alaska guide

Renowned Alaskan guide Phil Shoemaker, based at Grizzly Skins Lodge on the Alaska Peninsula, is a licensed Master Guide with expertise in wildlife and aviation.

1.1 Who is Phil Shoemaker?

Phil Shoemaker is a licensed Alaskan Master Guide and a prominent figure in wildlife management and outdoor adventures. Known for his expertise in guiding brown bear hunts, he operates from the Grizzly Skins Lodge on the Alaska Peninsula. With a degree in wildlife management and extensive experience, Phil has built a reputation for his deep knowledge of Alaska’s wilderness and its wildlife. He is also a commercial pilot and flight instructor, adding to his versatility in navigating the remote Alaskan terrain. Phil’s career spans decades, including military service, which has significantly influenced his approach to safety and survival in the wild. His dedication to conservation and client safety has made him a respected name in the guiding community.

1.2 Phil Shoemaker’s Role as a Master Guide

Phil Shoemaker serves as a licensed Alaskan Master Guide, specializing in leading expeditions for brown bear hunting and other wilderness adventures. Based at Grizzly Skins Lodge on the Alaska Peninsula, he leverages his extensive experience and deep knowledge of the region to ensure safe and successful outings. With a background in wildlife management and aviation, Phil combines his skills as a commercial pilot and flight instructor to navigate Alaska’s remote terrain. His role involves guiding clients through challenging environments while prioritizing safety and ethical hunting practices. Phil’s expertise has been honed over decades, including military service, which instilled in him a strong sense of discipline and responsibility. His reputation as a Master Guide underscores his commitment to preserving Alaska’s wildlife and providing unparalleled outdoor experiences for his clients.

Background and Education

Phil Shoemaker holds a degree in Wildlife Management, served in Vietnam, and is a commercial pilot, blending academic and practical expertise in Alaska’s wilderness.

2.1 Early Life and Career

Phil Shoemaker’s early life laid the foundation for his future in Alaska’s wilderness. Growing up with a passion for the outdoors, he developed a deep connection with nature and wildlife. After completing his education, Shoemaker pursued a career in wildlife management, which eventually led him to Alaska. His experiences as a guide and outdoorsman were further shaped by his military service, including a tour in Vietnam. This period not only honed his survival skills but also instilled a sense of discipline and leadership, which would become essential in his role as a Master Guide. These formative years set the stage for his successful career in guiding and conservation.

2.2 Education in Wildlife Management

Phil Shoemaker’s educational background in wildlife management was pivotal in shaping his career as a guide. He earned a degree in wildlife management, which provided him with a strong foundation in ecology, conservation, and animal behavior. This education equipped him with the knowledge to navigate Alaska’s vast wilderness effectively and understand the intricate relationships within its ecosystems. His studies also emphasized the importance of sustainable practices, which he applies in his guiding and conservation efforts.

Shoemaker’s formal training complemented his hands-on experience, enabling him to offer expert guidance in hunting and wildlife expeditions. His educational focus on wildlife management continues to influence his approach to ethical and responsible outdoor adventures in Alaska.

2.3 Military Service and Its Impact on His Career

Phil Shoemaker’s military service played a transformative role in shaping his career as a guide. After serving in Vietnam, he returned with a heightened sense of discipline and leadership, which he applied to his outdoor pursuits. His experience in challenging environments honed his ability to navigate remote terrains and manage risks, skills that are essential for guiding in Alaska’s wilderness.

The military also instilled in him a strong work ethic and adaptability, qualities that have been instrumental in his success as a guide. Following his service, Shoemaker pursued his passion for wildlife and hunting, leading him to establish a career in Alaska’s rugged landscapes. His military background continues to influence his approach to safety and logistics in his guiding endeavors.

Phil Shoemaker as a Licensed Master Guide

Renowned as a licensed Master Guide, Phil Shoemaker offers expert brown bear hunting and wildlife expeditions from Grizzly Skins Lodge on Alaska’s Peninsula.

3.1 Certifications and Qualifications

Phil Shoemaker holds the prestigious title of a licensed Alaskan Master Guide, a distinction requiring extensive experience and expertise in wilderness navigation and wildlife management. He possesses a degree in Wildlife Management, underscoring his deep understanding of ecosystems and conservation practices. Additionally, Phil is a certified commercial pilot and flight instructor, skills that enhance his ability to operate in Alaska’s remote terrains. His qualifications are further bolstered by years of guiding experience, including leading brown bear hunts and expeditions in challenging environments like the Becharof National Wildlife Refuge. His military service, including a tour in Vietnam, has also contributed to his discipline and leadership abilities, making him a highly respected figure in the guiding community.

3.2 Experience in Guiding Brown Bear Hunts

Phil Shoemaker has extensive experience guiding brown bear hunts across Alaska, particularly in remote and challenging environments like the Alaska Peninsula and Becharof National Wildlife Refuge. His expertise in tracking and understanding brown bear behavior has made him a sought-after guide for hunters seeking trophy bears. Shoemaker’s deep knowledge of the terrain and wildlife, combined with his ability to navigate rugged landscapes, ensures successful and safe expeditions. He has guided numerous clients through demanding conditions, earning a reputation for reliability and professionalism. His hands-on approach and dedication to ethical hunting practices have solidified his standing as one of Alaska’s premier brown bear guides, catering to discerning hunters seeking unforgettable adventures.

3.4 Notable Expeditions and Adventures

Phil Shoemaker has led numerous memorable expeditions across Alaska, showcasing his exceptional guiding skills and deep connection with the wilderness. One of his most notable adventures involved a 2016 encounter with a brown bear while guiding fishing clients in the Alaska bush, highlighting his ability to handle high-pressure situations. He has also guided hunters and photographers in remote areas like Becharof National Wildlife Refuge, offering unparalleled access to wild landscapes and wildlife. His expeditions often involve navigating rugged terrain, ensuring clients experience Alaska’s untamed beauty safely. Shoemaker’s adventures are marked by his dedication to ethical practices and a passion for sharing Alaska’s natural wonders, solidifying his reputation as a premier guide in one of the world’s most unforgiving environments.

Grizzly Skins of Alaska

Grizzly Skins of Alaska, a family-owned business, offers unique hunting and wildlife experiences for adventurous travelers, operating from the Alaska Peninsula under Phil Shoemaker’s expert guidance.

4.1 Overview of the Family-Owned Business

Grizzly Skins of Alaska is a family-run enterprise catering to adventurous travelers seeking unique hunting and wildlife experiences. Based in the pristine Alaska Peninsula, the business is deeply rooted in Phil Shoemaker’s passion for conservation and exploration. Established with the goal of providing exceptional guided tours, it focuses on creating unforgettable journeys for hunters, anglers, and nature enthusiasts. The company prides itself on its commitment to sustainable tourism and ethical hunting practices, ensuring that visitors experience Alaska’s untouched wilderness responsibly. With a strong emphasis on safety and client satisfaction, Grizzly Skins of Alaska has built a reputation as a premier destination for those seeking authentic Alaskan adventures.

4.2 Services Offered by Grizzly Skins of Alaska

Grizzly Skins of Alaska specializes in world-class brown bear hunts, fishing expeditions, and wildlife photography tours. Led by Phil Shoemaker, a licensed Master Guide, the company offers tailored experiences for hunters, anglers, and nature enthusiasts. Services include guided brown bear hunting in remote wilderness areas, trophy fishing trips, and bear viewing tours. The company also provides logistical support for adventurers, ensuring safe and memorable experiences in Alaska’s rugged terrain. With a focus on ethical hunting practices and environmental stewardship, Grizzly Skins of Alaska caters to those seeking authentic and responsible wildlife encounters. Their expeditions are designed to immerse clients in Alaska’s pristine natural beauty while promoting conservation and sustainability.

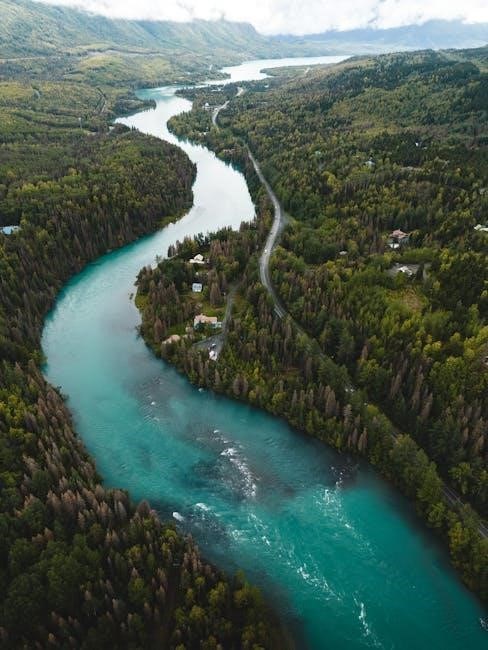
4.3 Location and Operational Base

Grizzly Skins of Alaska operates from its base within the Becharof National Wildlife Refuge, a remote and pristine region of Alaska. The company’s homestead, nestled in this vast wilderness, serves as the hub for their expeditions. Strategically located near abundant wildlife habitats, the base provides easy access to prime hunting and fishing areas. The refuge’s untouched landscapes and diverse ecosystems make it an ideal location for brown bear hunting, fishing, and wildlife photography. Grizzly Skins of Alaska’s operational base is equipped to handle the unique challenges of Alaska’s wilderness, ensuring clients are well-supported during their adventures. The remote location also offers a unique opportunity to experience the untouched beauty of Alaska’s wild spaces.

Phil Shoemaker’s Expertise in Bear Hunting

Phil Shoemaker is a leading Alaskan bear hunting guide, renowned for his expertise in brown bear expeditions and commitment to client safety in remote wilderness environments.

5.1 Brown Bear Hunting in Alaska

Phil Shoemaker is a highly respected guide for brown bear hunting in Alaska, operating from the remote Alaska Peninsula. With decades of experience, he specializes in tracking and hunting these majestic creatures in their natural habitat. His expertise includes understanding bear behavior, selecting prime locations, and ensuring safe and ethical hunting practices. Shoemaker’s deep knowledge of the terrain and wildlife allows him to lead clients to successful hunts while minimizing risks. He emphasizes the importance of preparedness, physical endurance, and mental focus when venturing into Alaska’s unforgiving wilderness. His dedication to conservation and sustainable hunting practices has earned him a reputation as a responsible and skilled outfitter in the region.

5.2 The 2016 Incident with a Brown Bear

In 2016, Phil Shoemaker made headlines after a dramatic encounter with a large brown bear while guiding fishing clients in the Alaska bush. During the incident, the bear charged the group, prompting Shoemaker to act swiftly for their safety. He fatally shot the bear using his 9mm pistol, showcasing his expertise and calm under pressure. This event highlighted his proficiency in bear safety and defensive tactics, further solidifying his reputation as a skilled and reliable guide. The incident also underscored the importance of preparedness and situational awareness in Alaska’s wild environments. Shoemaker’s actions were widely discussed, emphasizing his ability to handle high-stakes situations effectively.

5.3 Phil Shoemaker’s Approach to Bear Safety

Phil Shoemaker prioritizes bear safety through education, preparedness, and situational awareness. He ensures clients understand bear behavior and body language to minimize risks. Shoemaker emphasizes carrying appropriate gear, including bear spray and firearms, while teaching clients how to use them effectively. His approach includes maintaining a clean camp, storing food properly, and avoiding attractants. Shoemaker also stresses the importance of staying alert in bear country, recognizing signs of aggression, and reacting calmly. His extensive experience has honed his ability to assess situations and make quick, informed decisions, ensuring both client and animal safety. This balanced approach reflects his deep respect for Alaska’s wildlife and commitment to responsible guiding practices.

Phil Shoemaker’s Other Skills and Professions

Phil Shoemaker is a licensed Alaskan Master Guide with a degree in wildlife management. He is a commercial pilot and flight instructor.

6.1 Commercial Pilot and Flight Instructor

Phil Shoemaker’s aviation expertise complements his guiding career. As a commercial pilot, he navigates Alaska’s rugged terrain with precision, ensuring safe transport for clients. His role as a flight instructor highlights his commitment to sharing knowledge, teaching others to master Alaska’s challenging skies. This dual proficiency in aviation and wildlife management underscores his versatility and deep connection to Alaska’s wilderness, making him a unique figure in both industries.

6.2 Wildlife Management and Conservation Efforts

Phil Shoemaker’s dedication to wildlife management and conservation is integral to his work in Alaska. With a degree in wildlife management, he applies his knowledge to balance hunting practices with ecological preservation. His efforts focus on maintaining healthy bear populations and habitats, ensuring sustainable coexistence between humans and wildlife. Phil advocates for responsible hunting and environmental stewardship, contributing to Alaska’s conservation initiatives. His holistic approach emphasizes the importance of preserving natural ecosystems for future generations, aligning with his role as both a guide and a conservationist.

Media Appearances and Interviews

Phil Shoemaker has appeared on podcasts like The Big Game Hunting Podcast and Ron Spomer Outdoors, discussing brown bear hunting and bear protection strategies.

7.1 Podcast Interviews and Discussions

Phil Shoemaker has been a guest on several notable podcasts, including The Big Game Hunting Podcast and Ron Spomer Outdoors. These discussions often focus on his expertise in brown bear hunting, safety protocols, and conservation efforts. In these interviews, Shoemaker shares insights gained from decades of guiding in Alaska’s wilderness, emphasizing the importance of preparedness and respect for wildlife. He also recounts personal experiences, such as the 2016 incident involving a brown bear, to illustrate key lessons in survival and decision-making. His engaging storytelling and deep knowledge of Alaska’s ecosystems make his podcast appearances both educational and entertaining for outdoor enthusiasts.

7.2 Featured Articles and Publications

Phil Shoemaker has been featured in various outdoor and wildlife publications, highlighting his expertise in bear hunting and conservation. Articles in magazines like Field & Stream and Outdoor Life often showcase his insights on Alaska’s wildlife, particularly brown bears. A 2016 piece detailed his encounter with a brown bear, while a 2020 article in Hunting Magazine explored his strategies for safe and ethical hunting practices. Shoemaker’s contributions provide valuable knowledge for hunters and conservationists alike, emphasizing the balance between wildlife management and outdoor adventures. His writing reflects his deep connection to Alaska’s wilderness and his commitment to preserving its natural beauty for future generations.

7.3 Public Speaking Engagements

Phil Shoemaker frequently shares his expertise through public speaking engagements, captivating audiences with tales of Alaska’s wilderness and wildlife. He has spoken at outdoor expos, conservation events, and hunting symposia, where he emphasizes bear safety and ethical hunting practices. His talks often highlight personal anecdotes, such as the 2016 brown bear incident, offering practical insights and lessons learned. Shoemaker’s ability to connect with diverse audiences makes him a sought-after speaker, while his passion for conservation underscores the importance of protecting Alaska’s ecosystems. By blending storytelling with educational content, he inspires both hunters and nature enthusiasts to respect and preserve the wild.

Safety and Survival in Alaska’s Wilderness

Phil Shoemaker emphasizes preparedness and situational awareness, drawing from his 2016 brown bear incident, to ensure client safety in Alaska’s remote and unforgiving terrain.

8.1 Phil Shoemaker’s Approach to Client Safety

Phil Shoemaker prioritizes client safety through meticulous planning and situational awareness, honed from decades of guiding in Alaska’s unforgiving wilderness. His approach includes thorough risk assessments, ensuring clients are prepared for the challenges of remote areas. Shoemaker emphasizes the importance of staying alert and understanding wildlife behavior, particularly when dealing with bears. He also ensures that all clients are equipped with necessary safety gear and understand emergency protocols. Drawing from his 2016 brown bear encounter, Shoemaker has refined his strategies to minimize risks while providing an authentic Alaskan adventure. His military background and wildlife management expertise further enhance his ability to maintain a safe and structured environment for clients.

8.2 Survival Skills and Tactics in Remote Areas

Phil Shoemaker’s extensive experience in Alaska’s wilderness has honed his survival skills, emphasizing preparedness and adaptability. He teaches clients to navigate using natural landmarks and basic tools, ensuring they can find their way in vast, remote areas. Shelter construction, fire starting, and water purification are essential techniques he imparts, drawing from his military background and years of guiding. Shoemaker also stresses the importance of staying calm and making rational decisions under pressure, which can be life-saving in critical situations. His practical knowledge of Alaska’s harsh environment ensures clients are equipped to handle emergencies, making him a trusted figure in wilderness survival and exploration.

Environmental Advocacy and Conservation

Phil Shoemaker advocates for Alaska’s wildlife preservation, supporting sustainable hunting practices and conservation efforts that protect the state’s pristine ecosystems for future generations.

9.1 Phil Shoemaker’s Views on Wildlife Conservation

Phil Shoemaker is a strong advocate for wildlife conservation, emphasizing the importance of sustainable practices to protect Alaska’s ecosystems. He believes in balancing human activities with nature, ensuring that hunting and tourism do not harm wildlife populations. Shoemaker supports ethical hunting practices and educates clients on the significance of preserving natural habitats. His work through Grizzly Skins of Alaska reflects his commitment to conservation, promoting responsible tourism that respects the environment. By sharing his knowledge, Shoemaker aims to inspire others to join in efforts to safeguard Alaska’s wildlife for future generations.

9.2 Contributions to Alaska’s Ecosystem

Phil Shoemaker’s contributions to Alaska’s ecosystem are significant, particularly through his work in wildlife management and conservation. As a licensed Master Guide, he actively promotes sustainable hunting practices, ensuring that wildlife populations remain healthy. Shoemaker’s efforts include educating clients and the public about the importance of preserving natural habitats and respecting wildlife. His involvement in conservation initiatives helps maintain the balance of Alaska’s delicate ecosystems. Additionally, his role in guiding and tourism supports local communities while fostering an appreciation for the state’s natural beauty. Shoemaker’s dedication to environmental stewardship has made a lasting impact on Alaska’s wilderness and its inhabitants.

Personal Life and Legacy

Phil Shoemaker’s legacy as a guide and conservationist is deeply rooted in Alaska’s wilderness. His family, including his son Taj, continues his traditions in wildlife and aviation.

10.1 Family and Personal Interests

Phil Shoemaker’s personal life reflects a deep connection to Alaska’s wilderness and his family. His son, Taj, a registered Alaskan guide and owner of Island Air Service, continues Phil’s legacy in wildlife guiding and aviation. Phil’s interests extend beyond guiding, as he is passionate about wildlife management, conservation, and storytelling. A commercial pilot and flight instructor, Phil’s love for aviation complements his work in remote Alaskan regions. He is also known for his dedication to mentoring and sharing knowledge about Alaska’s ecosystems. Outside of work, Phil enjoys sharing stories of his adventures and advocating for responsible land use. His personal interests and family ties underscore his commitment to preserving Alaska’s wild beauty for future generations.

10.2 Legacy as a Guide and Conservationist

Phil Shoemaker’s legacy as a guide and conservationist is rooted in his dedication to Alaska’s wilderness and wildlife. As a Master Guide and wildlife management expert, he has earned a reputation for his unparalleled knowledge of brown bears and ethical hunting practices. His work at Grizzly Skins of Alaska has set a standard for responsible tourism and conservation. Phil’s commitment to preserving Alaska’s ecosystems is evident in his advocacy for sustainable land use and wildlife protection. His appearances in media, including podcasts and publications, have further cemented his influence, inspiring others to respect and protect wild spaces. Through his guiding philosophy and conservation efforts, Phil Shoemaker leaves a lasting impact on Alaska’s outdoor traditions and environmental stewardship.

Byjacquelyn

9 inch round cake cutting guide

A 9-inch round cake typically serves 30 coffee portions or 20-23 dessert servings, making it ideal for gatherings. Its 9-inch diameter and standard height allow for even slicing and efficient serving, ensuring everyone enjoys a fair share. This guide helps you master cutting techniques for perfect portions every time.

Understanding the Importance of Proper Cake Cutting

Proper cake cutting ensures even portion distribution, maintaining presentation and guest satisfaction. It prevents uneven slices and waste, making every serving visually appealing and fair. Correct techniques also enhance efficiency, especially for large events, while preserving the cake’s structural integrity. Even slicing fosters a professional appearance, crucial for weddings and gatherings, ensuring all guests enjoy consistent flavors and textures. Mastering these skills elevates both the cake’s appeal and the overall event experience.

Overview of the 9 Inch Round Cake Size

A 9-inch round cake is a popular size for gatherings, offering approximately 30 coffee portions or 20-23 dessert servings. Its diameter and standard height provide ample space for decorative designs while ensuring manageable slicing. This size strikes a balance between serving capacity and ease of handling, making it ideal for events requiring a substantial yet versatile dessert option. The 9-inch round cake is a practical choice for both casual and formal settings, accommodating various serving needs effectively.

Serving Sizes and Portions

Serving sizes vary based on event needs. A 9-inch round cake offers 30 coffee portions or 20-23 dessert servings. Coffee servings are ideal for events where a taste is sufficient, while dessert servings provide a larger portion. Adjusting portion sizes allows flexibility for different gatherings, ensuring every guest enjoys a fair share.

Coffee Servings vs. Dessert Servings

Coffee servings are smaller, typically 1×1.5 inches, designed for a quick taste, ideal for large gatherings. Dessert servings are larger, around 1×3 inches, meant to satisfy sweet cravings. A 9-inch cake yields 30 coffee servings or 20-23 dessert servings. Coffee servings suit buffets, while dessert servings are better for sit-down meals. Understanding this difference helps in planning and ensuring each guest enjoys the perfect portion size for the occasion.

Event-Style Servings for Larger Gatherings

For larger events, a 9-inch round cake can be cut into smaller, event-style servings, typically 1×1.5 inches, allowing up to 30 portions. This method is ideal for weddings, buffets, or parties, where guests prefer a bite-sized treat. Thin slices ensure everyone gets a taste without overwhelming them. This approach maximizes the cake’s yield while maintaining presentation and freshness, making it a practical choice for hosting large groups efficiently.

Tools Needed for Cutting a 9 Inch Round Cake

A sharp serrated knife and a cake server are essential for clean cuts and serving. Optional tools include a cake stand for stability and a turntable for easy access.

Essential Cutting Tools: Knives and Servers

A serrated knife is crucial for smooth, even cuts through the cake. Choose a long, sharp blade for precise slicing. Pair it with a sturdy cake server for portioning and serving. Ensure knives are dry after washing to prevent slipping. Optional tools include a cake stand for stability and a turntable for easy access. A hot knife, warmed with water, can help achieve clean edges. These tools ensure efficient cutting and professional presentation.

Using a Cake Stand for Stability

A cake stand is essential for stabilizing your 9-inch round cake, ensuring even slicing and preventing wobbling. Its elevated design improves visibility and accessibility, making it easier to cut and serve. Opt for a stand with a non-slip base for added stability, especially on smooth surfaces. Some stands feature a turntable, allowing easy cake rotation for uniform slicing precisely. This tool enhances both efficiency and presentation, ensuring every slice is perfect and evenly portioned.

Basic Cutting Techniques

Mastering basic cutting techniques ensures even slices. Start by making vertical cuts from top to bottom, then create uniform slices using a serrated knife. This method guarantees consistent portions and a clean presentation, essential for any event or gathering. Elevate your cake-cutting skills with these simple, effective strategies.

How to Achieve Equal Slice Sizes

To achieve equal slice sizes, start by marking the cake into equal sections using toothpicks or a knife. For a 9-inch round cake, aim for 8-10 slices. Place the cake on a stand for stability. Insert a serrated knife vertically at the 12 o’clock position, then slice horizontally across the cake. Rotate the cake and repeat, ensuring each slice is uniform in width. This method guarantees even distribution and a clean, professional presentation for any event.

Grid Cutting Method for Even Distribution

The grid cutting method ensures even distribution of slices. Start by marking the cake’s top with intersecting lines, creating a grid pattern. Use a serrated knife to make vertical cuts along the lines, then rotate the cake 90 degrees and repeat. This method allows for uniform slices and minimizes waste. For a 9-inch round cake, aim for 8-10 slices. Using a cake stand improves stability, ensuring clean cuts and consistent portions throughout.

Advanced Cutting Tips

Use a serrated knife and cake stand for stability. Apply gentle pressure, cutting in smooth motions to minimize crumbs. Ensure even pressure to prevent uneven slices.

Minimizing Crumbs and Waste

Use a serrated knife for smooth cuts, reducing crumbs. Chill the cake before cutting to firm it, minimizing waste. Cut in a gentle sawing motion, applying even pressure. Remove crumbs from the knife between slices to prevent spreading. For leftover pieces, consider toasting crumbs for toppings or snacks, ensuring nothing goes to waste. A clean, sharp knife and steady hand are key to achieving neat, crumb-free slices every time.

How to Cut Clean, Straight Edges

For clean, straight edges, use a serrated knife and a gentle sawing motion. Place the cake on a stable surface or cake stand. Slice vertically from top to bottom, applying consistent pressure. To ensure straightness, align the knife with the edge of the cake. After each cut, wipe crumbs from the knife to maintain precision. For perfectly aligned slices, use a ruler or straightedge as a guide. This technique minimizes uneven edges and ensures professional-looking cuts every time.

Tiered Cake Considerations

A 9-inch round cake can be seamlessly integrated into tiered designs, offering stability and visual balance when paired with larger or smaller tiers, ensuring a professional presentation.

Integrating 9 Inch Round Cakes into Tiered Designs

A 9-inch round cake is a popular choice for tiered designs, serving as a sturdy base or middle tier. Its 30 coffee portions make it ideal for larger events, complementing other tiers seamlessly. When paired with smaller or larger cakes, it ensures visual balance and stability. Proper alignment and support, such as using dowels, are essential for a professional presentation. This setup allows for efficient serving while maintaining an elegant, multi-tiered display perfect for weddings or celebrations.

Serving Sizes for Multi-Tiered Cakes

For multi-tiered cakes, a 9-inch round cake typically serves 30 coffee portions, while larger tiers increase overall servings. A three-tier setup with 5, 7, and 9-inch cakes serves approximately 114 coffee portions. Similarly, a six-tier configuration can serve up to 148 portions. These sizes are approximate, as the number of servings may vary based on slice dimensions and cake height. Proper planning ensures every guest enjoys a consistent and delicious portion.

Safety and Handling

Use a sharp knife and stable surface to prevent accidents. Always cut away from your body and keep fingers away from the blade. Ensure the cake is secure on a stand or plate before cutting to avoid collapse or movement.

Safe Cutting Practices

Always use a sharp serrated knife for clean cuts and to minimize accidents. Place the cake on a stable, flat surface or cake stand to prevent movement. Cut away from your body and keep fingers away from the blade. Ensure the cake is completely cooled before cutting to avoid structural weakness. Using a cake server or spatula alongside the knife can help lift slices safely. Wearing gloves can also enhance grip and control during the cutting process.

Preventing Cake Collapse During Cutting

To prevent a 9-inch round cake from collapsing during cutting, ensure it is completely cooled and set. Use a sharp serrated knife to make clean, even cuts, avoiding tearing. Place the cake on a stable surface or cake stand to maintain balance. Cut in a controlled, vertical motion first, then use a cake server to carefully lift slices without applying excess pressure. Avoid overfilling with frosting to keep the structure intact. Proper handling and support are key to maintaining the cake’s stability during the cutting process;

Customizing Portions

Adjust slice sizes based on the event, with smaller portions for coffee servings and larger for desserts. A 9-inch round cake offers flexibility for any gathering, ensuring each guest receives a fair share. Consider dietary needs, such as gluten-free or vegan options, to accommodate all preferences. This customization ensures satisfaction and inclusivity at any event.

Adjusting Slice Sizes for Different Events

Adjusting slice sizes for different events ensures optimal serving. For weddings or formal gatherings, smaller coffee portions (1.5×1 inches) are ideal, while larger dessert slices (3×1 inches) suit parties or dinners. Use the grid cutting method to achieve consistent sizes. For larger events, create more slices by cutting smaller portions, maximizing the cake’s reach. This flexibility ensures every guest receives an appropriately sized slice, maintaining both satisfaction and presentation.

Special Dietary Considerations

For guests with dietary restrictions, allocate specific slices for gluten-free, vegan, or sugar-free portions. Use separate cutting tools to prevent cross-contamination. Label each dietary option clearly. Consider smaller slices for calorie-conscious guests. Ensure even distribution by marking the cake beforehand. This approach accommodates diverse needs while maintaining fairness and presentation. Clear communication about portion options ensures everyone feels included and catered to at the event.

Visual Guide and Diagrams

Diagrams illustrate step-by-step cutting techniques, ensuring even slices and efficient serving. Visual aids help achieve consistent portion sizes, making the process simpler and more precise for all users.

Importance of Visual Aids in Cutting

Visual aids, such as diagrams and step-by-step guides, provide clarity and precision when cutting a 9-inch round cake. They help ensure even portion sizes, reduce waste, and simplify the cutting process. By following illustrated instructions, anyone can achieve professional-looking slices, making the task less intimidating for novice bakers or hosts. These tools are especially useful for large gatherings or events, where consistency and efficiency are key to serving guests effectively.

Step-by-Step Cutting Diagrams

Step-by-step cutting diagrams are invaluable for achieving precise and even slices. They illustrate how to make initial vertical cuts down the center, followed by horizontal cuts for layered cakes. These visual guides often show how to divide the cake into equal sections, ensuring consistency. Diagrams also highlight techniques to minimize crumbs and waste, making the cutting process efficient and stress-free. By following these visual instructions, anyone can master the art of cutting a 9-inch round cake perfectly every time.

Leftover Storage and Reheating

Store leftover cake in an airtight container to maintain freshness. Keep at room temperature for up to a day or refrigerate for longer. For reheating, microwave slices for 10-15 seconds or warm in a preheated oven at 250°F for a few minutes to restore softness.

How to Store Cut Cake Properly

To maintain freshness, store cut cake in an airtight container or wrap tightly with plastic wrap. Keep at room temperature for up to 24 hours or refrigerate for 3-5 days. For longer storage, freeze slices in an airtight container for up to 3 months. Ensure the container is moisture-proof to prevent drying out. If refrigerated, allow slices to come to room temperature before serving for optimal taste and texture.

Reheating Strategies for Freshness

For optimal freshness, reheat cut cake slices in the microwave for 10-15 seconds or in a preheated oven at 250°F for 5-7 minutes. To retain moisture, wrap slices in a damp paper towel or aluminum foil. Avoid overheating, as it can dry out the cake. If refrigerated, let slices reach room temperature before reheating. These methods ensure the cake remains soft and flavorful, maintaining its original texture and taste for a delightful serving experience.

Mastering the 9-inch round cake cutting techniques ensures even distribution and clean cuts. Use sharp tools, minimize waste, and consider creative presentation ideas for a polished look.

Final Thoughts on Cutting a 9 Inch Round Cake

Cutting a 9-inch round cake effectively requires precision and the right tools. Aim for consistent slice sizes to ensure fairness and satisfaction. Sharp knives and a stable cake stand are essential for clean cuts. Minimize crumbs by slicing gently and evenly. Consider the event type—coffee portions for larger gatherings, dessert slices for smaller groups. With practice, you’ll achieve professional-grade cuts, making every serving memorable and visually appealing. Happy baking and slicing!

Additional Presentation Ideas

Elevate your 9-inch round cake’s appeal with creative presentation. Use a decorative cake stand to showcase its height and design; Arrange slices in a pattern or fan shape on a serving platter. Top with fresh flowers or greenery for a festive look. Consider adding a centerpiece or themed toppers to match the event. For a modern touch, drizzle glaze or sauce artfully over the slices. Proper presentation enhances the visual experience, making your cake a standout at any gathering or celebration.

Byjacquelyn

fairview lab guide

The Fairview Lab Guide is a comprehensive resource for healthcare professionals and patients, offering detailed information on diagnostic tests, services, and tools to support informed healthcare decisions.

1.1 Overview of the Fairview Lab Guide

The Fairview Lab Guide provides a detailed directory of diagnostic tests, including hematology, chemistry, and microbiology, along with Current Procedural Terminology (CPT) codes for reference. It serves as a comprehensive resource for healthcare professionals and patients, offering insights into lab services, testing procedures, and result interpretation.

The guide also covers access to express lab testing without a doctor’s order, enabling individuals to monitor their health independently. Additionally, it includes information on logging into Atlas (formerly LabWorks), a web-based platform compatible with Internet Explorer, ensuring seamless access to lab reports and services.

1.2 Key Features and Benefits

The Fairview Lab Guide offers a comprehensive test directory with searchable options, categorized by hematology, chemistry, and microbiology, ensuring easy access to diagnostic information. It provides Current Procedural Terminology (CPT) codes, aiding in accurate billing and insurance processes.

Key benefits include access to express lab testing without a doctor’s order, empowering individuals to monitor their health proactively. The guide also supports understanding test results, fostering informed healthcare decisions. Additionally, it includes detailed login instructions for Atlas (formerly LabWorks), a web-based platform optimized for Internet Explorer, ensuring streamlined access to lab services and reports.

Fairview Lab Test Directory

The Fairview Lab Test Directory is a searchable database of diagnostic tests, categorized by hematology, chemistry, and microbiology, providing quick access to detailed test information and CPT codes.

2.1 Searchable Database of Diagnostic Tests

The Fairview Lab Test Directory features a user-friendly, searchable database of diagnostic tests, enabling quick access to test details. Users can search by test name, category, or keyword, streamlining the process of finding specific diagnostic information. The database is organized into categories such as hematology, chemistry, and microbiology, allowing healthcare professionals to efficiently locate tests relevant to their specialty. Additionally, each test entry includes descriptions, specimen requirements, and reference ranges, ensuring comprehensive information for accurate test ordering and interpretation. This tool enhances clinical decision-making and supports efficient patient care.

2.2 Categories of Tests (Hematology, Chemistry, Microbiology)

The Fairview Lab Guide organizes diagnostic tests into three primary categories: hematology, chemistry, and microbiology. Hematology focuses on blood and blood-forming tissues, including tests like complete blood counts (CBC) and coagulation studies. Chemistry tests analyze bodily fluids for substances such as glucose, cholesterol, and enzymes, providing insights into organ function and metabolic health. Microbiology involves identifying pathogens, including bacteria, viruses, and fungi, through cultures, PCR, and other methods. These categories ensure a structured approach to diagnostic testing, helping healthcare providers quickly identify and manage conditions. Each category is designed to support accurate diagnosis, treatment monitoring, and overall patient care.

2.3 Current Procedural Terminology (CPT) Codes

The Fairview Lab Guide includes Current Procedural Terminology (CPT) codes for diagnostic tests, based on American Medical Association (AMA) guidelines. These codes are essential for billing, insurance claims, and standardizing medical procedures. Each test in the directory is assigned a unique CPT code, ensuring accurate documentation and reimbursement. The codes are updated regularly to reflect changes in medical practices and technologies. By providing CPT codes, the guide helps healthcare providers and patients understand the costs and requirements associated with each test. This section emphasizes the importance of CPT codes in maintaining consistency and transparency in healthcare billing and administrative processes.

M Health Fairview Express Lab Testing

M Health Fairview Express Lab Testing offers convenient access to diagnostic tests without a doctor’s order, enabling individuals to monitor their health independently and efficiently.

3.1 Access to Testing Without a Doctor’s Order

M Health Fairview Express Lab Testing allows patients to access diagnostic tests without a doctor’s order, providing flexibility and convenience for health monitoring. This service empowers individuals to take control of their health by ordering tests independently. With a user-friendly platform, patients can select from a range of tests, view results, and track their health progress. The program is designed to support proactive health management, enabling early detection of potential issues. Results are typically available quickly, and patients are encouraged to discuss findings with their healthcare providers for personalized care. This initiative aligns with the growing trend of patient-centered, self-directed healthcare options.

3.2 Monitoring Your Own Health

M Health Fairview Express Lab Testing enables individuals to monitor their health proactively through regular testing. This service allows patients to track key health metrics, such as cholesterol levels, blood glucose, and other vital indicators, without the need for a doctor’s order. By providing easy access to diagnostic tests, Fairview supports early detection of potential health issues, empowering individuals to take charge of their well-being. Regular health monitoring is particularly beneficial for managing chronic conditions and maintaining overall wellness. This initiative promotes a proactive approach to healthcare, encouraging patients to stay informed and engaged in their health journey.

3.3 Understanding Test Results

Understanding your test results is crucial for making informed health decisions. Fairview provides clear and detailed reports, explaining each test’s purpose and results. Results are categorized as normal, abnormal, or flagged for further review. Reference ranges help interpret values, ensuring clarity. Patients are encouraged to discuss results with healthcare providers to address concerns or next steps. This transparency empowers individuals to take an active role in their care, fostering better health outcomes and patient-provider communication.

Logging Into Atlas (formerly LabWorks)

Accessing Atlas requires supervisor approval and is exclusively compatible with Internet Explorer, ensuring a secure and efficient laboratory management experience.

4.1 Access Requirements

Access to Atlas (formerly LabWorks) is granted only after approval from your supervisor and M Health Fairview. Users must ensure they have proper credentials and permissions. The system is web-based and operates exclusively on Internet Explorer, with no support for other browsers like Chrome or Edge. Security protocols are in place to protect sensitive data, and access is restricted to authorized personnel only. Additional permissions may be required for specific features or test directories within the platform. Always follow the login procedures provided by your supervisor to ensure proper access and compliance with security guidelines.

4.2 Browser Compatibility (Internet Explorer Only)

Atlas (formerly LabWorks) is exclusively compatible with Internet Explorer, ensuring optimal functionality and security. Other browsers, such as Chrome or Edge, are not supported. This requirement guarantees consistent performance and proper access to the system’s features. Users must use Internet Explorer to log in and navigate the platform effectively. Compatibility issues with other browsers may result in limited functionality or inability to access certain tools. To ensure a seamless experience, always use the latest version of Internet Explorer when accessing Atlas. This browser requirement is strictly enforced to maintain system integrity and user experience; Adherence is essential for proper operation.

Laboratory Services

Fairview Laboratory Services provides comprehensive testing, including acute care support and reference diagnostic testing, with a strong emphasis on quality, accuracy, and timely results to support patient care.

5.1 Acute Care Support

Fairview Laboratory Services offers robust acute care support, providing rapid and reliable test results for emergency and critical care situations. This service ensures timely interventions by delivering accurate diagnostic data, enabling healthcare providers to make informed decisions quickly. The lab supports a wide range of acute care needs, from emergency department testing to critical care monitoring, ensuring seamless integration with patient care workflows. With advanced technology and a focus on efficiency, Fairview’s acute care support is designed to meet the urgent demands of healthcare settings, aiding in the prompt diagnosis and treatment of acute conditions while maintaining high standards of quality and reliability.

5.2 Reference Diagnostic Testing

Fairview Laboratory Services provides specialized reference diagnostic testing for complex and rare conditions, offering a wide range of advanced assays and esoteric tests. These services are designed to support healthcare providers in diagnosing unusual or challenging cases. The lab collaborates with leading diagnostic experts to ensure accurate and reliable results. With state-of-the-art technology and a commitment to quality, Fairview’s reference testing services are tailored to meet the unique needs of patients requiring specialized care. This ensures that even the most uncommon conditions can be accurately diagnosed and managed, further enhancing the overall quality of patient care and treatment outcomes across the healthcare network.

5.3 Emphasis on Quality and Accuracy

Fairview Laboratory Services places a strong emphasis on quality and accuracy, ensuring reliable and precise test results. The lab adheres to rigorous quality control measures and utilizes cutting-edge technology to maintain high standards. By following industry guidelines and best practices, Fairview delivers accurate diagnostic information, enabling healthcare providers to make informed decisions. The commitment to quality is reflected in timely and reliable results, which are critical for patient care and treatment planning. This focus on accuracy and precision ensures that Fairview remains a trusted partner in advancing healthcare outcomes and maintaining patient trust.

Fairview Microwave Test Cables

Fairview Microwave offers flexible 50 and 67 GHz VNA test cables, designed for durability and precision in RF applications, ensuring reliable performance in demanding environments.

6.1 Flexible 50 and 67 GHz VNA Test Cables

Fairview Microwave’s flexible VNA test cables operate at 50 and 67 GHz, ideal for high-frequency applications. These cables are designed with durable materials to withstand repeated bending, ensuring minimal signal loss and maintaining performance integrity. Their flexible design allows for easy installation in confined spaces, making them suitable for laboratory and field testing. The cables are constructed with advanced RF connectors to ensure secure connections and consistent results. This makes them a reliable choice for engineers and technicians conducting precise vector network analysis in various environments, from research labs to industrial settings, ensuring accurate and repeatable measurements.

6.2 Durability and Design

The Fairview Microwave test cables are engineered for exceptional durability, featuring lightweight, flexible constructions that resist wear and tear. Their robust design ensures consistent performance across multiple applications, with high-quality RF connectors that minimize signal degradation. The cables are built to withstand the rigors of frequent use and harsh environments, making them ideal for both laboratory and field applications. Their compact, flexible form factor allows for easy handling and installation in tight spaces, while maintaining precise electrical performance. This combination of durability and innovative design ensures reliable results in demanding test and measurement scenarios, supporting accurate vector network analysis (VNA) across various frequencies.

Lab Manual and Problem-Solving

The guide provides structured lab reports and C programming solutions, ensuring clear documentation and effective problem-solving techniques for accurate and efficient laboratory workflows and diagnostic processes.

7.1 Structure of a Lab Report

A well-structured lab report typically includes an introduction, materials, methods, results, and conclusion. The introduction outlines the objective, while materials list equipment and supplies. Methods detail procedures, ensuring reproducibility. Results present findings objectively, often with graphs or tables. The conclusion interprets data, linking results to objectives. Proper formatting and clarity are essential for accuracy and professionalism. Each section should be concise, avoiding unnecessary details. This structure ensures that lab reports are comprehensive, organized, and easy to understand, facilitating effective communication of scientific findings and contributing to reliable research outcomes. Adhering to this format is crucial for consistency and credibility in laboratory documentation.

7.2 C Programming Problem-Solving Guide

The C Programming Problem-Solving Guide provides a structured approach to resolving coding challenges; It includes step-by-step techniques, exercises, and examples to enhance programming skills. The guide emphasizes understanding common errors and debugging strategies. By breaking down complex problems into manageable parts, it helps developers improve logical thinking and efficiency. Topics range from basic syntax to advanced algorithms, ensuring a comprehensive learning experience. This resource is invaluable for both beginners and experienced programmers, offering practical solutions to real-world coding dilemmas. The guide also includes best practices for writing clean, readable, and maintainable code, fostering a solid foundation in C programming fundamentals.

The Fairview Lab Guide serves as an essential resource for navigating diagnostic testing, laboratory services, and problem-solving tools. It provides comprehensive details on test directories, CPT codes, and express lab testing options, empowering users to make informed decisions. The guide also delves into technical aspects, such as C programming problem-solving and lab report structures, catering to diverse needs. By emphasizing quality, accuracy, and innovation, the Fairview Lab Guide supports healthcare professionals and individuals in achieving optimal outcomes. This resource remains a vital tool for staying updated on laboratory practices and advancements in diagnostic care.

Byjacquelyn

optavia 5 and 1 guide

The Optavia 5 & 1 Guide offers a structured weight-loss plan with 5 daily fuelings and 1 lean meal, promoting hydration and frequent eating for sustainable results.

Overview of the Optavia 5 & 1 Plan

The Optavia 5 & 1 Plan is a structured weight-loss program designed to promote sustainable habits. It combines 5 daily fuelings—nutritionally balanced, portion-controlled meals—with 1 lean and green meal, emphasizing protein and vegetables. The plan encourages hydration and frequent eating every 2-3 hours to support metabolism and energy levels. By focusing on balanced nutrition and mindful portion control, the program helps individuals achieve weight loss while developing healthier eating patterns and lifestyle choices.

Importance of Hydration and Frequent Eating

Hydration and frequent eating are cornerstone principles of the Optavia 5 & 1 Plan. Drinking at least 100 ounces of water daily helps maintain metabolism, reduce hunger, and support digestion. Eating every 2-3 hours stabilizes blood sugar levels, boosts energy, and prevents overeating. These practices promote a balanced nutritional intake, which is essential for achieving sustainable weight loss and maintaining overall health and well-being, making it easier to adhere to the program.

Understanding the Optavia 5 & 1 Plan

The Optavia 5 & 1 Plan combines 5 nutrient-dense fuelings with 1 lean meal, designed to promote steady weight loss, improve health, and establish sustainable habits.

Structure: 5 Fuelings and 1 Lean & Green Meal

The Optavia 5 & 1 Plan is built around 5 daily fuelings—nutrient-dense products like shakes, bars, and snacks—and 1 lean meal. Each fueling is designed to provide balanced nutrition, while the lean meal includes protein, vegetables, and healthy fats. This structure ensures portion control, reduces hunger, and supports steady weight loss. The plan emphasizes hydration and frequent eating to maintain energy levels and metabolism, helping users establish sustainable eating habits for long-term health.

Role of Fuelings in Weight Loss

Fuelings are nutrient-dense products designed to support weight loss by providing balanced nutrition in convenient forms like shakes, bars, and snacks. They help maintain consistent calorie intake, preventing hunger and overeating. Each fueling is portion-controlled, ensuring you stay on track without excess calories. By incorporating essential vitamins, minerals, and protein, fuelings promote satiety and support metabolism. This structured approach, combined with expert guidance, helps users achieve sustainable weight loss while building healthier eating habits.

Optavia Diabetes & Seniors Guide

The Optavia Diabetes & Seniors Guide provides tailored plans for safe and effective weight loss, emphasizing balanced nutrition and support for specific health needs.

Special Considerations for Diabetics

The Optavia Diabetes & Seniors Guide offers tailored plans for individuals with diabetes, focusing on blood sugar management and balanced nutrition. It includes structured meal plans, portion control, and resources to help maintain stable glucose levels. A simple flowchart assists in selecting the right Optavia plan, ensuring personalized support. Regular consultation with a healthcare provider is emphasized to adapt the program safely. This approach helps diabetics achieve weight loss while managing their condition effectively.

Guidance for Seniors on the Optavia Plan

The Optavia Diabetes & Seniors Guide provides tailored support for seniors, focusing on safe and effective weight loss while addressing age-related health concerns. It emphasizes regular consultation with healthcare providers to adapt the plan for individual needs. The program’s structured approach, with 5 fuelings and 1 lean meal, helps seniors maintain energy levels and muscle mass. Portion control and balanced nutrition are prioritized to support overall health and mobility, ensuring the plan is both sustainable and age-appropriate. This guide helps seniors achieve their goals safely and confidently.

Optavia Condiments and Flavor Enhancement

Optavia-approved condiments enhance meals without compromising the plan, offering flavors like herbs, low-calorie dressings, and spices to transform dishes while staying on track.

Approved Condiments for the 5 & 1 Plan

The Optavia 5 & 1 Plan allows specific condiments to enhance flavor without derailing progress. Approved options include herbs, spices, low-calorie dressings, and certain sauces. These condiments add variety to meals, keeping them exciting and satisfying. Optavia’s condiment list ensures adherence to the program’s guidelines while providing flexibility for culinary creativity. By incorporating these approved flavor enhancers, users can enjoy delicious meals that align with their weight-loss and health goals.

Maximizing Flavor Without Compromising the Plan

Enhancing meals on the Optavia 5 & 1 Plan is easy with creative seasoning and approved ingredients. Herbs, spices, and low-calorie dressings add flavor without compromising results. Experiment with grilling, roasting, or sautéing to elevate dishes. Incorporating vibrant vegetables and lean proteins keeps meals engaging. Optavia-approved recipes and meal prep ideas inspire variety, ensuring satisfaction and adherence to the plan. By exploring these techniques, users can enjoy flavorful meals while staying on track with their health and weight-loss goals.

Lean & Green Meals: The Backbone of the Plan

Lean & Green meals combine lean proteins, low-carb vegetables, and healthy fats, providing balanced nutrition and keeping you satisfied while supporting weight management.

Recipes and Ideas for Lean & Green Meals

Discover delicious and easy-to-make Lean & Green meal recipes, featuring lean proteins, low-carb vegetables, and healthy fats. From grilled chicken with roasted broccoli to pan-seared salmon with asparagus, these meals are designed to keep you satisfied and on track. Try creative options like cauliflower rice stir-fries or zucchini noodles with garlic shrimp. Each recipe emphasizes balanced nutrition and flavor, ensuring you enjoy every bite while supporting your weight-loss journey.

Balancing Macronutrients in Lean & Green Meals

Balancing macronutrients in Lean & Green meals is essential for optimal weight loss and health. Aim for a combination of lean proteins (e.g., chicken, fish, or tofu), low-carb vegetables (like spinach, broccoli, or bell peppers), and small portions of healthy fats (such as avocado or olive oil). This balance ensures you stay satisfied, supports metabolic function, and aligns with the 5 & 1 Plan’s goals. Proper macronutrient ratios help maintain energy levels and promote long-term success on your weight-loss journey.

Role of Optavia Coaches

Optavia coaches provide guidance, support, and personalized strategies to help clients stay on track with the 5 & 1 Plan, offering education and motivation for lasting success.

Support and Guidance from Optavia Coaches

Optavia coaches offer personalized support and guidance, helping clients navigate the 5 & 1 Plan with confidence. They provide expert advice on meal planning, hydration, and mindful eating, while sharing their own success stories to inspire motivation. Coaches also help clients set realistic goals and celebrate milestones, fostering a sense of community and accountability. Their role is crucial in addressing challenges and ensuring clients stay on track, making the journey to weight loss and better health both achievable and sustainable.

Community and Accountability in the Optavia Program

The Optavia program emphasizes the power of community and accountability to drive success. Members connect through social media groups, forums, and local events, sharing experiences and tips. This collective support fosters motivation and camaraderie, helping individuals stay committed to their goals. Additionally, tools like daily tracking journals and progress monitoring enhance accountability, ensuring consistent effort. The program encourages open communication with coaches and peers, creating a supportive environment that celebrates milestones and overcomes challenges together, leading to lasting lifestyle changes and improved health outcomes.

Dining Out on the Optavia 5 & 1 Plan

Dining out on the Optavia 5 & 1 Plan requires strategic choices, such as opting for grilled or baked lean proteins, avoiding sauces, and staying hydrated to maintain adherence to your weight-loss goals while enjoying meals away from home.

Strategies for Dining Out While Staying on Plan

When dining out, plan ahead by reviewing menus to identify lean protein and vegetable options. Choose grilled or baked dishes without heavy sauces. Opt for smaller portions or share meals to control intake. Pair protein with low-carb sides like steamed vegetables or a salad. Avoid bread, appetizers, and sugary drinks. Stay hydrated by drinking water before and during the meal. Focus on whole foods and avoid extras like dressings or condiments high in sugar or unhealthy fats. This approach ensures you stay on track while enjoying social dining experiences.

Optavia Dining Out Guide: Restaurant Strategies

The Optavia Dining Out Guide provides practical strategies for maintaining your 5 & 1 plan while enjoying restaurant meals. Focus on selecting lean proteins like grilled chicken or fish, paired with non-starchy vegetables. Avoid bread, pasta, and high-carb sides. Opt for steamed or roasted options instead of fried or sauced dishes. Request dressings or condiments on the side to control added calories. Choose smaller portions or share plates to manage intake. Use the guide to identify compliant menu items and stay on track while dining out. Planning ahead ensures success and confidence in social settings.

Tracking Progress and Staying Motivated

Tracking your 5 & 1 journey with a 30-day journal ensures accountability, helping you monitor fuelings, hydration, and activity. Celebrate milestones to stay motivated and focused on your goals.

Using a 30-Day Journal for Accountability

A 30-day journal is a powerful tool for tracking your Optavia 5 & 1 journey, helping you stay accountable and motivated. By documenting your daily fuelings, hydration levels, and physical activity, you can monitor progress and identify patterns. This journal also allows you to set and celebrate milestones, fostering a sense of accomplishment. Regular reflection on your habits and goals ensures consistency and helps you stay committed to the program. It’s a simple yet effective way to maintain focus and achieve long-term success with the Optavia plan.

Importance of Tracking Fuelings and Activity

Tracking your daily fuelings and activity is crucial for staying on course with the Optavia 5 & 1 Plan. By monitoring your fuelings, you ensure adherence to the program, helping you maintain consistent nutrition and portion control. Documenting physical activity promotes accountability and encourages regular movement, which supports weight loss and overall health. This practice also helps identify patterns, allowing you to make adjustments for better results. Consistent tracking fosters discipline and motivation, empowering you to achieve your weight-loss and wellness goals effectively.

Specialty Plans and Considerations

The Optavia 5 & 1 Guide offers tailored plans for nursing mothers, teens, and individuals with specific health needs, ensuring safe and effective weight loss for all.

Nursing Mothers Plan Details

The Optavia Nursing Mothers Plan is specifically designed for lactating women, ensuring they meet their nutritional needs while supporting their health and their baby’s health. This plan includes tailored meal plans and guidelines to maintain proper nutrition during this critical phase. It emphasizes balanced fuelings and lean protein sources to support milk production and overall well-being. Nursing mothers are advised to consult with their healthcare provider and Optavia coach to customize the plan according to their individual needs, ensuring both mother and baby thrive.

Teen Boys or Teen Girls Plan Information

The Optavia Teen Plan is tailored to meet the unique nutritional needs of adolescents, ensuring healthy growth and development. This plan provides balanced fuelings and meals, with a focus on essential nutrients for energy and growth. It is designed to support active lifestyles while teaching healthy eating habits. Teens and their families should consult with their healthcare provider and Optavia coach to adapt the plan according to individual needs, promoting a positive relationship with food and long-term health benefits.

Optavia Cost and Budgeting

Optavia kits range from $350 to $450 monthly, with additional costs for extra foods. Budgeting tips help manage expenses while maintaining the program’s structure and benefits.

Understanding the Cost of Optavia Kits

The Optavia 5 & 1 Plan kits typically range from $350 to $450 per month, depending on the specific program and options chosen. This cost includes 5 daily fuelings and support materials. Additional expenses for groceries, such as lean proteins and vegetables, are also required. While the initial investment may seem high, the structured approach and proven results often justify the cost for many users. Budgeting tips, like tracking expenses and planning meals, can help manage overall spending while following the program.

Budgeting for Additional Foods and Supplies

Budgeting for additional foods and supplies on the Optavia 5 & 1 Plan is essential for success; Beyond the kit costs, you’ll need to allocate funds for fresh produce, lean proteins, and healthy fats. Planning meals in advance and shopping for seasonal or sale items can help reduce expenses. Consider purchasing non-perishables in bulk and using coupons to save. These strategies ensure you stay within budget while maintaining the quality and variety needed for your Lean & Green meals. Proper planning makes the program more affordable and sustainable long-term.

Optavia Snacks and Meal Prepping

Optavia-approved snacks and meal prepping are key to staying on track. Healthy snacks like veggies, lean proteins, and portion-controlled options keep you satisfied between meals. Meal prepping ensures convenience and adherence to the plan, making weight management easier and sustainable.

Snack Ideas That Fit the 5 & 1 Plan

Snacking on the Optavia 5 & 1 Plan is easy with approved options like hard-boiled eggs, celery with peanut butter, or a protein shake. Opt for low-carb veggies such as cucumber slices or bell pepper sticks. For a sweet craving, consider a small portion of sugar-free gelatin or a handful of raw almonds. These snacks keep you satisfied, support weight loss, and align with the plan’s guidelines. Always choose portion-controlled options to stay on track and avoid derailment.

Meal Prepping Tips for Success

Meal prepping is key to staying consistent with the Optavia 5 & 1 Plan. Start by planning your meals for the week, ensuring each day includes 5 fuelings and 1 lean meal. Use portion-controlled containers to organize your food, making grab-and-go options easy. Prep proteins like grilled chicken or fish in advance, and portion out veggies like broccoli or cauliflower. Keep meals fresh by storing them in airtight containers or freezer bags. For convenience, prep your fuelings in individual servings to avoid last-minute decisions. This strategy helps maintain adherence and simplifies your journey to weight loss and better health.

Optavia FAQs and Troubleshooting

Addressing common questions and challenges, this section provides practical solutions to stay on track, ensuring success with the Optavia 5 & 1 Plan.

Common Questions About the 5 & 1 Plan

The Optavia 5 & 1 Plan is designed to promote weight loss through structured eating. Common questions include how the plan works, its suitability for different lifestyles, and expected results. Many ask about the role of fuelings, lean meals, and hydration. Others inquire about customization, especially for diabetics or seniors. Questions also arise about dining out, tracking progress, and maintaining motivation. Addressing these helps ensure a smooth journey toward health and wellness with Optavia.

Troubleshooting Common Challenges

Common challenges on the Optavia 5 & 1 Plan include staying hydrated, managing hunger between fuelings, and maintaining the plan while dining out. Solutions like meal prepping, using approved condiments, and relying on Optavia coaches can help overcome these obstacles. Tracking progress and staying accountable through journals or apps also aids in consistency. For those struggling, reconnecting with health goals and celebrating small victories can reignite motivation and keep users on track with the Optavia 5 & 1 Plan.

Byjacquelyn

safety guide for sos

Emergency SOS features are critical tools in modern smartphones, enabling quick access to emergency services and location sharing with contacts during urgent situations, ensuring rapid assistance and safety.

1.1 Importance of Emergency SOS in Modern Smartphones

Emergency SOS has become a vital feature in modern smartphones, offering rapid access to emergency services and real-time location sharing with contacts. This ensures timely assistance during critical situations, preventing potentially dangerous situations from escalating. By enabling quick connection to help, it plays a crucial role in personal safety, making it an indispensable tool in today’s digital age.

The integration of Emergency SOS highlights its essential role in safeguarding users, providing peace of mind through reliable and swift emergency response capabilities.

1.2 Overview of Safety Features in iOS and Android

iOS and Android offer a range of safety features, including Emergency SOS, Fall Detection, and Crash Detection. iOS 16 introduces Safety Check for privacy and security, while Android provides emergency location sharing and medical information storage. Both platforms enable quick access to emergency services, ensuring help is just a few taps or button presses away, enhancing user safety and peace of mind in critical situations.

Understanding Emergency SOS on iOS

Emergency SOS on iOS allows users to quickly call emergency services and notify contacts with a location, providing critical assistance during dangerous or life-threatening situations.

2.1 Key Features of iOS Emergency SOS

iOS Emergency SOS offers rapid access to emergency services, automatic alerts to designated contacts, and location sharing. It includes Emergency SOS via satellite for remote areas, Fall Detection, and Crash Detection, which automatically call emergency services if a severe incident is detected. These features ensure quick assistance and provide peace of mind in critical situations.

2.2 How to Activate Emergency SOS on iPhone

To activate Emergency SOS on an iPhone, quickly press and release the side button five times or swipe the Emergency SOS slider on the lock screen. This triggers a countdown, preventing accidental activation; After the countdown, your iPhone automatically contacts emergency services and alerts your designated emergency contacts with your location. This feature ensures swift assistance during critical situations, providing a reliable safety net for users;

2.3 Customizing Emergency SOS Settings

Customizing Emergency SOS settings on your iPhone allows you to tailor the feature to your needs. Open the Settings app, navigate to Emergency SOS, and adjust preferences such as enabling SOS by pressing the side button multiple times or setting up emergency contacts. You can also toggle automatic emergency calls and location sharing. Regularly updating these settings ensures your emergency contacts and preferences remain current, providing peace of mind and enhanced safety in critical situations.

Emergency SOS on Android Devices

Android devices offer Emergency SOS features, allowing users to quickly alert emergency contacts by pressing the power button multiple times, ensuring rapid assistance during critical situations.

3.1 Activating Emergency SOS on Android

On Android devices, Emergency SOS can be activated by pressing the power button five times or more. Users can also enable a touch-and-hold option for the Emergency SOS icon. This feature quickly alerts emergency contacts with your real-time location and sends periodic updates. It’s customizable, allowing users to set the number of presses required or toggle additional alerts. This feature ensures rapid assistance in critical situations and works even without an internet connection, making it a reliable safety tool for Android users worldwide.

3.2 Emergency SOS Features in Google Pixel Devices

Google Pixel devices offer enhanced Emergency SOS features through the Safety app. Users can quickly toggle emergency calls and send real-time location updates to contacts. The app includes a demo mode to test Emergency SOS without triggering alerts, ensuring preparedness. These features are seamlessly integrated, providing reliable assistance in critical situations and enhancing user safety with intuitive controls and immediate response capabilities.

3.3 Medical Information and Emergency Contacts

Storing medical information and emergency contacts on your smartphone is crucial for quick access during critical situations. Android devices allow users to record allergies, medications, and medical conditions, which can be viewed even when the phone is locked. Emergency contacts are alerted with location updates during an SOS activation, ensuring swift assistance. This feature is vital for first responders and loved ones, providing essential details when every second counts, and is a life-saving tool in emergencies.

Uber’s In-App SOS Button

Uber’s in-app SOS button provides immediate assistance during emergencies, allowing users to quickly alert authorities and share their location with emergency contacts for swift help.

4.1 How to Use Uber’s Emergency Assistance Feature

To use Uber’s Emergency Assistance feature, tap the safety icon in the app, select the SOS button, and confirm activation. This sends your real-time location and trip details to emergency contacts and authorities. Ensure your emergency contacts are pre-set in the app for quick access during urgent situations. This feature enhances safety by providing immediate help and keeping loved ones informed of your whereabouts. Always test the feature beforehand to ensure it works smoothly when needed.

4.2 Benefits of the SOS Button for User Safety

The SOS button in Uber provides immediate assistance during emergencies by sharing your location and trip details with emergency contacts. It ensures help reaches you quickly and keeps loved ones informed. This feature reduces anxiety and empowers users to act swiftly in unsafe situations. By offering a direct line to emergency services, it enhances overall safety and provides peace of mind for riders. Regular testing ensures reliability, making it a crucial tool for user protection.

Safety Check and Emergency Features in iOS 16

iOS 16 introduces Safety Check, a feature designed for users in dangerous situations, allowing quick access to emergency services and location sharing. It also enhances existing emergency features like Fall Detection and Crash Detection, ensuring rapid assistance during critical moments. These tools prioritize user safety and provide peace of mind through advanced security measures.

5.1 Overview of Safety Check in iOS 16

Safety Check in iOS 16 is a groundbreaking feature designed to assist users in dangerous or abusive situations by quickly accessing emergency services and sharing locations. It simplifies emergency contacts and disables location sharing to protect privacy. This tool is particularly beneficial for those in vulnerable situations, offering a secure way to regain control of their data and privacy. Apple’s focus on user safety and privacy makes this feature a vital addition to iOS 16.

5.2 Additional Safety Features in iOS 16

iOS 16 introduces enhanced safety features, including Fall Detection, which automatically contacts emergency services if a hard fall is detected, and Crash Detection for car accidents. Additionally, Emergency SOS via satellite enables users to call for help in remote areas without cellular coverage. These features, combined with improved location sharing and medical ID accessibility, provide comprehensive protection and peace of mind for iPhone users in critical situations.

Fall Detection and Crash Detection Features

Fall Detection and Crash Detection are advanced iOS features that automatically contact emergency services if a severe fall or car accident is detected, ensuring timely assistance.

6.1 How Fall Detection Works

Fall Detection uses iPhone’s advanced sensors to detect hard falls and automatically contact emergency services. It relies on the accelerometer and gyroscope to identify the impact. After detecting a fall, the iPhone waits for user response. If unresponsive, it initiates an emergency call and sends location to emergency contacts, ensuring immediate assistance. This feature is particularly beneficial for vulnerable users, providing peace of mind and critical support during accidents or injuries.

6.2 Crash Detection and Emergency Response

Crash Detection leverages iPhone’s advanced sensors like the accelerometer and gyroscope to detect severe car accidents. It identifies rapid deceleration, loud impact, or rolling vehicles. If a crash is detected, the iPhone activates Emergency SOS, automatically contacting emergency services and sharing the user’s location with emergency contacts. This feature, available on iPhone 14 and later models, provides critical assistance during car accidents, ensuring timely help and peace of mind for drivers and passengers alike in critical situations.

Emergency SOS via Satellite

Emergency SOS via Satellite enables users to send emergency signals without cellular service.
Available in the U.S. and Canada, with expansion planned, it ensures help is reachable anywhere.

7.1 Availability of Satellite Emergency SOS

Emergency SOS via satellite is initially available in the U.S. and Canada, with plans to expand to the U.K., France, Germany, and Ireland in December. This feature allows users to send emergency signals even without cellular service, ensuring help is accessible in remote areas. Apple’s commitment to user safety is evident through this innovative technology, which bridges connectivity gaps during critical situations. Availability will continue to grow, enhancing global emergency response capabilities for smartphone users.

7.2 How Satellite Emergency SOS Works

Satellite Emergency SOS connects your device directly to satellites when cellular service is unavailable. After activating the feature, your iPhone communicates with overhead satellites to send emergency messages and location data to authorities. Apple designed this system to work seamlessly, even in remote areas, with minimal delay. The process includes user prompts to clarify the emergency, ensuring precise assistance. This groundbreaking technology enhances safety for users in isolated locations, providing a reliable lifeline during critical moments. Availability is expanding globally to improve emergency response accessibility.

Activating Emergency Settings on Smartphones

Activating emergency settings on smartphones enables life-saving features like SOS, location sharing, and medical info access. These tools ensure real-time assistance during critical situations, enhancing user safety significantly.

8.1 Step-by-Step Guide to Enable Emergency Features

To enable emergency features on your smartphone, start by opening the Settings app and navigating to the Safety or Emergency section. For iOS, tap on Emergency SOS, then toggle on “Call with Hold” or “Call with Power Button.” On Android, go to Safety & Emergency, enable Emergency SOS, and choose the activation method, such as pressing the power button five times. Customize settings like emergency contacts and medical info for enhanced safety. Ensure to test the feature without triggering an alert to familiarize yourself with its operation.

8.2 Importance of Keeping Emergency Settings Updated

Regularly updating emergency settings is crucial for ensuring timely assistance in critical situations. Outdated information can delay response times or prevent emergency contacts from being notified. Features like Emergency SOS, Fall Detection, and Crash Detection rely on accurate settings to function effectively. Additionally, updating ensures access to the latest enhancements, such as satellite SOS availability and regional feature expansions. Keeping settings current maximizes safety and ensures emergency services can reach you quickly when needed most.

Testing Emergency SOS Features

Testing Emergency SOS ensures functionality and familiarity with its operation. It allows users to confirm that emergency contacts and features are correctly set up without triggering alerts.

9.1 How to Test Emergency SOS Without Triggering an Alert

Testing Emergency SOS without triggering an alert is crucial to ensure functionality. On iOS, go to Settings > Emergency SOS and enable “Call with Hold.” Press and hold the side button and a volume button until the slider appears. Drag it to test silently. For Android, open Safety and Emergency settings, enable Emergency SOS, and press the power button five times. Some devices allow demo mode to avoid sending alerts. Always confirm testing procedures in your device’s guide to prevent accidental emergency notifications.

9.2 Best Practices for Testing Emergency Features

Testing emergency features responsibly is essential to avoid false alerts. Use demo or test modes when available to simulate Emergency SOS activation without sending real notifications. Inform contacts beforehand to prevent panic. Familiarize yourself with your device’s specific Emergency SOS triggers, such as pressing the power button multiple times or holding volume controls. Test in a controlled environment and consult your device’s user guide for detailed instructions. Regular testing ensures functionality and preparedness for critical situations.

Additional Safety Features in Smartphones

Smartphones offer enhanced safety through medical info storage for allergies and medications, emergency contact alerts with real-time location sharing, and customizable settings to ensure personal safety and preparedness.

10.1 Medical Information and Emergency Contacts

Smartphones allow users to store medical information, such as allergies and medications, ensuring first responders have critical details during emergencies. Emergency contacts can be alerted instantly, sharing real-time location updates. This feature is especially vital for individuals with specific medical needs, providing quick access to life-saving data. By pre-setting emergency contacts, users can ensure loved ones are notified promptly, enhancing safety and response efficiency in critical situations. This integration of health and emergency systems offers comprehensive protection for smartphone users.

10.2 Location Sharing During Emergencies

Location sharing during emergencies ensures real-time updates are sent to emergency contacts, enabling precise tracking and faster response. iOS and Android devices automatically share location when Emergency SOS is activated, providing critical details to responders. This feature accelerates help delivery and enhances safety by keeping loved ones informed. Users can pre-select contacts for location sharing, ensuring privacy while maintaining emergency readiness. This capability is vital for timely assistance in critical situations, making it a cornerstone of modern smartphone safety systems.

Emergency SOS Activation Methods

Emergency SOS can be activated by pressing the power button multiple times or using touch-and-hold gestures, providing quick and intuitive ways to call for help during crises.

11.1 Pressing the Power Button for Emergency SOS

Pressing the power button multiple times is a quick way to activate Emergency SOS. On Android, pressing the power button five times triggers the feature, while iPhones may require pressing and holding. This method ensures rapid access to emergency services and location sharing with contacts, providing immediate assistance during critical situations. It’s a simple yet effective way to call for help when time is of the essence, offering peace of mind for users worldwide.

11.2 Touch and Hold Emergency SOS Activation

Touch and hold Emergency SOS activation provides a quick and intuitive way to call for help. On iOS, pressing and holding the side button and a volume button triggers the feature. Android users can enable Emergency SOS by touching and holding the power button or using a gesture. This method ensures rapid access to emergency services and location sharing with contacts. It’s a convenient option for situations requiring immediate assistance, offering users a reliable way to stay safe and connected during emergencies.

Regional Availability of Emergency SOS Features

Emergency SOS is initially available in the U.S. and Canada, with plans to expand to the U.K., France, Germany, and Ireland. Other regions vary by provider.

12.1 Countries Where Emergency SOS is Available

Emergency SOS is currently available in the United States and Canada, with plans to expand to the United Kingdom, France, Germany, and Ireland by December. Availability varies by region and service provider, so users should check with their providers for specific details to ensure access to these critical safety features during emergencies.

12.2 Future Expansion of Emergency SOS Services

Apple plans to expand Emergency SOS services to additional countries beyond the initial launch in the U.S., Canada, U.K., France, Germany, and Ireland. Future updates will include more regions, ensuring broader accessibility to critical safety features. The company aims to enhance global coverage, enabling users worldwide to benefit from emergency assistance and location sharing during crises. This expansion underscores Apple’s commitment to improving user safety and providing reliable emergency response tools across diverse markets.

Troubleshooting Emergency SOS Features

Common issues include accidental activation and failed SOS triggers. Check settings, ensure network connectivity, and restart your device. Update software for optimal functionality and reliability.

13.1 Common Issues with Emergency SOS Activation

Common issues with Emergency SOS activation include accidental triggers, failed SOS signals, and delayed emergency contact notifications. Ensure stable network connectivity and update your device’s software regularly. Accidental activations can be prevented by adjusting sensitivity settings or using a passcode. Additionally, verify that emergency contacts are correctly saved and that location services are enabled. For persistent problems, restart your device or reset Emergency SOS settings to default configurations for proper functionality.

13.2 Resolving Problems with Emergency Features

To resolve issues with Emergency SOS, ensure your device has a stable internet connection and updated software. Restart your device to clear temporary glitches. Check if location services are enabled, as they are crucial for sending your position to emergency contacts. Test the feature in a safe manner to confirm functionality. If problems persist, reset Emergency SOS settings to default or contact your device manufacturer for further assistance to ensure reliable operation during critical situations.

Best Practices for Using Emergency SOS

Use Emergency SOS only in genuine emergencies to avoid false alarms. Regularly update emergency contacts and medical info. Test features safely to ensure proper functionality when needed.

14.1 When to Use Emergency SOS

Emergency SOS should be activated in life-threatening situations, such as medical emergencies, accidents, or personal safety risks. Use it when immediate assistance is required, like during an attack or crash. Avoid using it for minor issues to prevent false alarms. Always assess the situation to ensure it warrants emergency services. Remember, this feature is designed to connect you with help quickly and share your location with contacts, so reserve it for genuine crises only.

14.2 Avoiding Accidental Activation of Emergency Features

To prevent accidental activation of Emergency SOS, ensure your device settings are adjusted properly. Avoid pressing the power button rapidly or holding it for extended periods unless necessary. Be mindful of button combinations that trigger Emergency SOS, such as pressing the side button multiple times. Regularly review your emergency contacts and medical information to avoid unintended alerts. Keeping your device secure and aware of its features can help prevent false emergency notifications.

Emergency SOS is a vital smartphone feature, enabling quick access to emergency services and location sharing. Customize settings to avoid accidental activation and stay safe.

15.1 Summary of Emergency SOS Features

Emergency SOS features provide instant access to emergency services, location sharing, and alerts for contacts. They include activations via power button presses, touch-and-hold, or satellite connectivity.

15.2 Final Tips for Staying Safe with Emergency SOS

To maximize safety, test Emergency SOS features in a controlled environment to avoid accidental alerts. Ensure emergency contacts are up-to-date and easily accessible. Familiarize yourself with regional availability and understand how satellite connectivity works in remote areas. Regularly update your phone’s emergency settings and keep location sharing enabled during crises. Stay informed about new features and best practices to leverage these tools effectively for personal safety.

Byjacquelyn

druid sod leveling guide

Druid leveling in Season of Discovery offers a versatile journey, allowing players to adapt to various roles. This guide provides insights into optimizing your Druid’s potential, covering the best specializations and strategies to enhance your leveling experience effectively.

1.1 Overview of Druid Class and Its Role in Leveling

The Druid class in Season of Discovery excels at versatility, offering three primary specializations: Feral, Balance, and Restoration. Each specialization caters to different playstyles, whether it’s dealing damage, tanking, or healing. Druids are renowned for their shapeshifting ability, which allows them to adapt to various situations, making them highly efficient for leveling. In their bear form, they can tank effectively, while cat form enhances mobility and damage output. Moonkin form, meanwhile, focuses on ranged spellcasting. This adaptability makes Druids a popular choice for players seeking a dynamic and self-sufficient leveling experience, capable of handling multiple roles seamlessly.

1.2 Importance of Choosing the Right Specialization

Selecting the appropriate Druid specialization is crucial for a smooth leveling experience. Feral excels in dealing melee damage and offers exceptional mobility, making it ideal for solo leveling. Balance, with its ranged spells, provides consistent damage output and is less dependent on gear. Restoration, while viable, is more suited for healing in groups. Each specialization requires distinct playstyles and resource management. Choosing the right one aligns with your preferred role, ensuring efficiency and enjoyment. This decision significantly impacts your leveling pace and overall performance in Season of Discovery.

1.3 Brief History of Druid Leveling in WoW Classic and TBC

Druid leveling in WoW Classic and TBC was challenging yet rewarding. In Classic, Druids faced difficulty due to limited mana efficiency and competition with other hybrid classes. However, their versatility in shapeshifting and adaptability made them unique. TBC introduced significant improvements, such as the addition of Lacerate and Mangle, which enhanced Feral Druids’ effectiveness. Balance Druids also gained prominence with the Wrath spell, offering reliable ranged damage. These changes solidified Druids as a viable choice for leveling, especially in later expansions. Understanding this history provides context for optimizing Druid leveling strategies in Season of Discovery.

Druid Playstyle and Leveling Strategies

Druid leveling in Season of Discovery combines versatility and adaptability. Feral excels in melee, Balance in ranged. Shapeshifting boosts mobility, making Druids efficient in solo or group play strategically.

2.1 Feral Druid: Pros and Cons for Leveling

Feral Druids excel in melee combat, offering high damage output and excellent mobility. Their ability to shapeshift into Cat Form provides a significant speed boost, reducing downtime between mobs. Energy-based attacks minimize mana dependency, making them ideal for prolonged combat sessions. However, Feral Druids lack ranged capabilities, making them less versatile in certain zones. Additionally, their reliance on gear for optimal performance can be a drawback in the early levels. Despite these challenges, Feral Druids remain a popular choice for leveling due to their efficiency and engaging playstyle, especially when paired with strategic questing routes and zone-specific optimizations.

2.2 Balance Druid: Advantages for Early-Leveling

Balance Druids offer a strong foundation for early-leveling due to their mana efficiency and access to powerful spells like Wrath and Moonfire. Their ability to deal consistent ranged damage minimizes downtime and allows for effortless kiting of mobs. The Teleport: Moonglade spell provides early access to a key travel tool, saving time when moving between zones. Additionally, Balance Druids can utilize their Boomkin form to handle multiple enemies simultaneously, making them highly effective in crowded questing areas. This specialization shines in its flexibility and sustainability, making it an excellent choice for players seeking a smooth and efficient leveling experience in Season of Discovery.

2.3 Restoration Druid: Viability in Leveling

Restoration Druids are highly viable for leveling due to their exceptional healing and sustainability. Their ability to regenerate mana through Innervate and heal themselves or others makes them durable in solo play. While not as damage-focused as Balance or Feral, Restoration Druids excel in handling multiple mobs with spells like Rejuvenation and Entangle. Their versatility allows them to adapt to various leveling scenarios, from questing to dungeon runs. Additionally, their ability to tank in Bear Form or heal in caster form provides unmatched flexibility. This makes Restoration Druids a reliable choice for players who enjoy a balanced and sustainable leveling experience in Season of Discovery.

2.4 Shapeshifting and Its Impact on Mobility

Shapeshifting is a cornerstone of Druid leveling, significantly enhancing mobility and versatility. Cat Form provides a 30% movement speed increase, making it ideal for traversing large zones quickly. Bear Form offers stamina and armor, enabling Druids to survive while moving through dangerous areas. Travel Form, available at level 16, further boosts movement speed, making it a game-changer for leveling. The ability to switch forms seamlessly allows Druids to adapt to any situation, whether it’s questing, dungeon running, or escaping threats. This unparalleled mobility ensures Druids can level efficiently, outpacing many other classes in terms of speed and flexibility in Season of Discovery.

Talent Builds for Druid Leveling

Optimizing talent builds is crucial for efficient Druid leveling. Feral and Balance Druids benefit from talents like Ferocity and Wrath, enhancing their core abilities. Key rune choices further amplify effectiveness, ensuring a smooth progression through levels.

3.1 Feral Druid Talent Build for Levels 1-30

For Feral Druids, the early levels focus on enhancing survivability and attack power. At level 1, prioritize Ferocity to increase crit chance. By level 5, invest in Sharpened Claws for improved bleed damage. At level 10, Savage Fury boosts attack power in cat form. Continue with talents like Predatory Strikes and Blood Frenzy to enhance melee capabilities. By level 20, select Leader of the Pack for added group utility. At level 25, Primal Precision ensures consistent damage output. finally, at level 30, choose Wrath for area-of-effect damage. This build maximizes DPS while maintaining mobility and survivability, making it ideal for solo leveling and dungeon runs.

3.2 Balance Druid Talent Build for Levels 1-30

For Balance Druids, early levels focus on enhancing spell damage and mana efficiency. Start with Wrath at level 1 for consistent damage. At level 5, invest in Nature’s Grasp to improve kiting. By level 10, Moonglow reduces mana costs, allowing more spellcasting. At level 15, Insect Swarm adds periodic damage. At level 20, Rejuvenation provides healing utility. At level 25, Celestial Focus improves spell hit rating. Finally, at level 30, unlock a 31-point talent like Starfall for AoE damage. This build emphasizes sustained damage output and mana management, making Balance Druids efficient for leveling and questing.

3.3 Key Talents for Leveling Efficiency

Key talents for leveling efficiency focus on enhancing mana management, damage output, and survivability. For Balance Druids, talents like Moonglow and Rejuvenation are crucial for reducing mana costs and providing healing. Insect Swarm adds consistent damage over time, while Celestial Focus improves spell hit rating. For Feral Druids, Savage Roar and Predatory Strikes boost attack power and critical strike chances. Additionally, Feline Swiftness enhances mobility, allowing faster travel between quests. These talents collectively ensure smoother leveling by balancing damage, survivability, and resource efficiency, making them indispensable for both specializations in Season of Discovery.

3.4 Talent Choices for Specific Zones

Talent choices for specific zones play a crucial role in optimizing your Druid’s leveling efficiency. In zones with heavy mob density, prioritize talents like Feline Swiftness for enhanced mobility or Insect Swarm for consistent AoE damage. For zones with tougher elite mobs, consider talents like Rejuvenation or Leader of the Pack to improve survivability. Additionally, in zones requiring frequent spellcasting, Celestial Focus can enhance spell hit rating, reducing resistances. Adapting your talent selection to the zone’s challenges ensures smoother progression and minimizes downtime, allowing you to level more effectively in Season of Discovery.

Rotation and Abilities for Druid Leveling

Mastering your rotation and abilities is key to efficient Druid leveling. Focus on shapeshifting to enhance mobility and damage, while balancing mana and energy for sustained play.

4.1 Basic Rotation for Feral Druid

The Feral Druid rotation revolves around maximizing damage while maintaining efficiency. Start by using Rake to apply the initial bleed, followed by Rip to extend the damage-over-time effect.

Use Ferocious Bite as a finisher when combo points are high, ensuring optimal energy management. Maintain Savage Roar to boost damage output and regenerate energy with Shred during downtime.

Keep Rejuvenation active for self-healing and utilize Thick Hide to reduce damage taken. Always prioritize shapeshifting to Cat Form for higher mobility and damage output, switching to Bear Form for survivability in tough situations.

Balance mana and energy usage to sustain a fluid rotation, ensuring minimal downtime between abilities; This rotation emphasizes consistency and adaptability, making Feral Druids formidable in both solo and group play.

4.2 Optimal Rotation for Balance Druid

For Balance Druids, the rotation focuses on maximizing spell damage while managing mana efficiently. Begin by applying Moonfire and Sunfire to your target to establish damage-over-time effects;

Use Wrath and Starfire to generate Astral Power, which powers your Starsurge ability. Cast Starsurge when Astral Power is high for significant burst damage.

During cooldowns, activate Celestial Alignment to enhance your spells, and use Incarnation: Chosen of Elune for increased damage output. Maintain Shapeshifting to Cat Form for mobility between enemies.

This rotation ensures consistent damage while managing mana, making Balance Druids highly effective in both solo and group leveling scenarios.

4.3 Essential Abilities for Faster Leveling

Druids have access to several key abilities that significantly enhance leveling speed. Shapeshifting is core, enabling forms like Cat (for speed) and Bear (for tanking). Use Rejuvenation to heal yourself and allies, reducing downtime.

Moonfire and Sunfire provide reliable damage-over-time effects, while Wrath and Starfire offer strong direct damage. Utilize Entangling Roots to control mobs and Cyclone to interrupt casts, preventing unnecessary damage.

Travel Form enhances mobility, allowing faster movement between zones. Always pre-cast Rejuvenation before combat to minimize health loss. These abilities synergize to create a smooth, efficient leveling experience.

4.4 Using Shapeshifting to Enhance Rotations

Shapeshifting is a cornerstone of Druid leveling, enabling seamless adaptation to combat situations. Use Cat Form for melee damage, focusing on Rip and Rake for consistent DPS. Bear Form excels in tanking, utilizing Swipe and Lacerate to handle multiple enemies. For caster-heavy rotations, Moonkin Form amplifies spell damage, with Wrath and Starfire as key abilities. Additionally, Travel Form enhances mobility, allowing quick repositioning between targets or zones. Always pre-cast Rejuvenation before shifting to maintain healing while in combat. By mastering form switches, Druids can optimize their rotation for maximum efficiency, blending damage, healing, and mobility seamlessly.

Gear and Equipment for Druid Leveling

Optimizing gear is crucial for Druid leveling. Focus on items enhancing mana, attack power, and stamina. Prioritize versatile gear that supports both casting and melee forms effectively.

5.1 Best Stats for Feral and Balance Druids

For Feral Druids, prioritize Agility for increased attack power and dodge chance, followed by Strength to enhance melee damage. Balance Druids should focus on Intellect to boost mana pool and spell power, with Spirit for improved mana regeneration. Both specs benefit from Stamina for survivability. Avoid items with unnecessary stats like block value for Feral or armor penetration for Balance; Optimize gear choices to align with your specialization, ensuring a balance between damage output and sustainability. Proper stat allocation significantly impacts leveling efficiency and overall performance in Season of Discovery.

5.2 Pre-Raid Gear Recommendations

Acquiring optimal pre-raid gear is crucial for Druids in Season of Discovery. Focus on items with Agility and Strength for Feral, enhancing attack power and survivability. Balance Druids should seek Intellect and Spirit for mana efficiency and spell damage. Key pieces include the Mantle of the Tiger for shoulders and Gloves of the Fang for Feral, while Balance Druids benefit from Crown of the Earth for the head. Utilize dungeon drops and quests in zones like the Sunken Temple and Maraudon. Don’t forget to equip the Rune of the Form for reduced mana costs. Proper pre-raid gear ensures a smooth transition into endgame content and enhances leveling efficiency.

5.3 Enchants and Gems for Leveling

Optimizing your gear with the right enchants and gems is essential for efficient Druid leveling. For Feral Druids, focus on Agility and attack power enchants, such as Cat’s Swiftness for boots and Executioner for weapons. Balance Druids should prioritize spellpower and Intellect enchants, like Spellpower on bracers and Mastery on gloves. Gems such as Agile Shadow Alexandrite and Potent Earth Agate are versatile choices for both specs. Additionally, using a Rune of the Form early on can significantly reduce mana costs, enhancing your leveling efficiency. Proper enchanting and gemming ensure your Druid performs at its best in any role during the leveling process.

5.4 Gear Progression Through Levels

Druid gear progression in Season of Discovery is crucial for maintaining efficiency. From levels 1-20, focus on equipping gear with Agility or Intellect, depending on your spec. At level 10, prioritize pieces with Stamina for survivability. By level 20, seek gear with attack power or spellpower to enhance your DPS. At level 30, dungeon drops like the Feralheart Raiment or Balance of the Feathers set become viable. By level 40, aim for pre-raid BiS items such as Stormshroud Armor. Regularly update your gear to ensure optimal performance, as even small upgrades can significantly impact your leveling speed and effectiveness in both PvE and PvP scenarios.

Leveling Zones and Questing Routes

Druids excel in zones like Field of Bone and PoK, utilizing shapeshifting for efficient questing. Follow optimized routes to minimize travel time and maximize XP gain through levels.

6.1 Best Zones for Druid Leveling in Classic WoW

In Classic WoW, Druids thrive in zones like Teldrassil (1-10) and Ashenvale (10-20) due to abundant quests and mobility. Westfall (15-25) and Redridge Mountains (20-30) offer efficient questing routes. Higher levels benefit from Felwood (40-50) and Winterspring (50-60), with dense XP and gear opportunities. Druids can exploit shapeshifting to navigate quickly, complete quests, and avoid unnecessary combat, making these zones ideal for rapid leveling. Proper zone progression maximizes XP gain and ensures a smooth journey to level 60.

6.2 Optimal Questing Routes for Feral Druids

Feral Druids excel in zones with dense quest concentrations and opportunities for stealthy gameplay. Starting in Teldrassil (1-10), focus on completing all quests before moving to Ashenvale (10-20). Transition to Westfall (15-25) and Redridge Mountains (20-30) for efficient XP gain. At higher levels, Felwood (40-50) and Winterspring (50-60) provide ideal terrain for utilizing Druid mobility. Prioritize quests in areas with minimal resistance, leveraging stealth and speed boosts to skip unnecessary combat. Grouping with others in dungeons like Deadmines or Stockade can also accelerate leveling, especially when using shapeshifting to control pulls and maintain a steady pace.

6.3 Zone-Specific Strategies for Balance Druids

Balance Druids thrive in zones where they can maximize their spellcasting efficiency. Start in Teldrassil (1-10), using Wrath and Moonfire to quickly clear mobs. Transition to Ashenvale (10-20), where your mana efficiency shines in dense quest areas. For Westfall (15-25), focus on grouping with others to minimize downtime. In Felwood (40-50), use your AoE spells like Hurricane to clear large groups swiftly. Finally, in Winterspring (50-60), leverage your high mobility to chain quests without interruption. Always prioritize zones with abundant quest density and minimal resistance to maximize XP gain while maintaining mana efficiency.

Tips and Tricks for Druid Leveling

Mastering Druid leveling requires balancing efficiency and awareness. Manage mana and energy wisely, use shapeshifting for mobility, and group with others to reduce downtime. Avoid common mistakes like overextending in combat or neglecting gear upgrades to ensure a smoother journey to level 60.

7.1 Managing Mana and Energy Efficiently

Efficient mana and energy management is crucial for Druid leveling. Monitor your resources closely, as Feral Druids rely on energy for melee attacks, while Balance Druids need mana for spells. Use abilities like Wrath or Moonfire judiciously to avoid depleted mana. Shapeshifting into forms like Cat Form or Bear Form can help conserve energy or regenerate mana. Avoid unnecessary ability usage and plan rotations to minimize downtime. For Feral Druids, prioritize attacks that generate combo points without overextending energy. Balance Druids should balance nukes with mana-regenerating abilities like Healing Touch or Innervate. Proper management ensures sustained leveling efficiency without frequent breaks.

7.2 Using Speed Boosts for Faster Travel

Druids can significantly enhance their leveling speed by utilizing speed boosts effectively. Forms like Cat Form and Cheetah Form provide increased movement speed, reducing travel time between quests and zones. Additionally, talents such as Feline Swiftness further boost movement speed, making it easier to cover large areas quickly. Using Mounts at level 30 can also drastically improve mobility. Combine these abilities with Warlock or Engineering speed enhancements for maximum efficiency. Efficient travel management allows more time for questing and combat, ensuring a smoother and faster leveling experience from 1 to 60.

7;3 Grouping with Other Classes for Efficiency

Grouping with other classes can significantly enhance your leveling efficiency as a Druid. Pairing with a Mage or Priest provides valuable crowd control and healing support, reducing downtime. Warlocks can offer summoning convenience and additional damage. Feral Druids benefit from tanking roles, while Balance Druids can focus on damage; Restoration Druids excel in healing, making group content smoother. Coordinating with others allows for faster dungeon clears and shared quest progress. This synergy maximizes efficiency, ensuring a more enjoyable and rapid journey to level 60. By leveraging class strengths, you can tackle challenging content and optimize your leveling experience in Season of Discovery.

7.4 Avoiding Common Mistakes While Leveling

Avoiding common mistakes is crucial for efficient Druid leveling. Overextending in combat without sufficient healing or crowd control can lead to unnecessary deaths. Many players neglect to manage their mana and energy efficiently, causing downtime. Failing to utilize shapeshifting appropriately can hinder mobility and combat effectiveness. Additionally, ignoring gear upgrades or enchantments can reduce your effectiveness in quests and dungeons. It’s important to stay aware of your surroundings and avoid pulling too many mobs at once, especially in challenging zones. By being mindful of these pitfalls, you can maintain a smooth and efficient leveling process, ensuring steady progress through Season of Discovery.

Druid leveling in Season of Discovery is both rewarding and efficient with proper specialization and strategy. By mastering shapeshifting, rotations, and gear choices, Druids can excel in any role, ensuring a smooth journey to level 60 and preparing for endgame content.

8.1 Summary of Key Points for Druid Leveling

Druid leveling in Season of Discovery is highly efficient with the right approach. Choosing the correct specialization—Feral for melee, Balance for ranged, or Restoration for healing—is crucial. Gear and enchants play a significant role in optimizing performance, while rotations and ability usage ensure smooth progression; Questing routes and zone-specific strategies help minimize downtime. Managing mana and energy efficiently, leveraging speed boosts, and avoiding common mistakes are essential for a seamless experience. By mastering these elements, Druids can excel in their journey to level 60 and prepare effectively for endgame content.

8.2 Final Tips for Reaching Level 60

To efficiently reach level 60, maintain a consistent rotation optimized for your specialization. Ensure your gear is well-equipped with appropriate enchants and gems to maximize performance. Utilize consumables like food and potions to enhance your leveling speed. Grouping with other classes can significantly boost efficiency, especially in dungeons. Don’t underestimate the power of speed boosts from abilities like Dash or mounts to reduce travel time. Manage your mana and energy wisely to avoid downtime. Stay focused and avoid burnout by taking breaks when needed. Finally, explore zone-specific strategies for higher levels and prepare your character for endgame content once you hit level 60.

8.3 Preparing for Endgame Content

As you approach level 60, focus on preparing your druid for endgame content by acquiring pre-raid gear and enchants. Prioritize stats like stamina, agility, and intellect based on your specialization. Familiarize yourself with key talents and rotations for raids and dungeons. Join a guild or group to secure a spot in early raids. Consider crafting essential items or gathering materials for your endgame setup. Additionally, practice your role in dungeons to refine your skills. Finally, stay updated on patch notes and community guides to ensure you’re well-prepared for the challenges ahead.

Byjacquelyn

rafferty’s nutrition guide

Rafferty’s Nutrition Guide offers a comprehensive approach to healthy eating‚ emphasizing calorie deficit‚ macronutrient tracking‚ and balanced meals. It provides practical advice for sustainable weight management and overall wellness‚ tailored to various lifestyles and dietary goals.

Overview of the Nutrition Guide

Rafferty’s Nutrition Guide is a comprehensive resource designed to help individuals achieve their health and wellness goals through sustainable eating habits. It emphasizes the importance of a calorie deficit for weight management‚ macronutrient tracking‚ and balanced nutrition. The guide provides practical strategies for meal planning‚ hydration‚ and incorporating physical activity. It also addresses mindful eating practices and offers support for special diets‚ ensuring a holistic approach to nutrition. With actionable tips and community support‚ Rafferty’s Nutrition Guide empowers users to make informed choices for long-term health and well-being.

Core Principles of Rafferty’s Nutrition Guide

Rafferty’s Nutrition Guide focuses on calorie deficit‚ macronutrient balance‚ and hydration. It emphasizes sustainable habits‚ combining nutrition with physical activity for holistic health and wellness.

Importance of Calorie Deficit for Weight Management

A calorie deficit is essential for weight loss‚ as it ensures the body burns more calories than it consumes. By creating this deficit‚ individuals can shed excess fat while preserving muscle mass. Tracking daily intake and adjusting macronutrient ratios helps maintain this balance. A sustainable calorie deficit‚ combined with regular physical activity‚ promotes long-term weight management and overall health. Rafferty’s Nutrition Guide emphasizes this principle to help individuals achieve their weight goals effectively and safely.

Macronutrient Tracking: Proteins‚ Carbs‚ and Fats

Tracking proteins‚ carbohydrates‚ and fats is crucial for a balanced diet. Proteins aid in muscle repair and growth‚ while carbs provide energy. Healthy fats support brain function and hormone production. Rafferty’s Nutrition Guide advocates for monitoring these macronutrients to ensure optimal intake‚ tailored to individual goals. By balancing these nutrients‚ individuals can maintain energy levels‚ support physical performance‚ and promote overall health. Proper tracking helps in making informed dietary choices‚ aligning with weight management and wellness objectives.

Essential Nutrients for a Balanced Diet

A balanced diet requires essential nutrients like vitamins‚ minerals‚ and fiber to support bodily functions. These nutrients ensure optimal health‚ energy‚ and proper organ function‚ aiding overall well-being.

Role of Proteins in Muscle Growth and Repair

Proteins are essential for muscle growth and repair‚ serving as the building blocks of tissue. They provide amino acids necessary for muscle synthesis‚ helping to rebuild and strengthen muscle fibers after exercise. Adequate protein intake supports muscle recovery‚ reducing soreness and improving overall physical performance. Rafferty’s Nutrition Guide emphasizes the importance of lean protein sources like chicken‚ fish‚ and plant-based options to maintain muscle health and promote a toned physique. Ensuring sufficient protein intake is crucial for active individuals aiming to enhance muscle mass and sustain energy levels throughout the day.

Significance of Carbohydrates for Energy

Carbohydrates are the body’s primary energy source‚ fueling both the brain and physical activities. They are essential for maintaining energy levels‚ supporting daily functions‚ and enhancing athletic performance. Complex carbs‚ such as whole grains and vegetables‚ provide sustained energy‚ while simple carbs offer quick bursts. Rafferty’s Nutrition Guide highlights the importance of balancing carb intake with protein and fats to optimize energy utilization and prevent crashes. By focusing on whole‚ nutrient-rich foods‚ individuals can harness the benefits of carbohydrates for improved vitality and overall health.

Healthy Fats: Sources and Benefits

Healthy fats are essential for maintaining optimal health‚ supporting heart function‚ and aiding in the absorption of vitamins. Rafferty’s Nutrition Guide emphasizes incorporating sources like avocados‚ nuts‚ seeds‚ and olive oil into meals. These fats not only enhance flavor but also provide sustained energy and improve brain function. By including healthy fats in your diet‚ you can reduce inflammation‚ support hormone production‚ and maintain healthy cholesterol levels; Balancing fat intake with other macronutrients ensures a well-rounded diet that promotes overall wellness and satisfaction‚ making it easier to stick to your nutrition goals.

Meal Planning and Preparation Tips

Plan meals weekly‚ measure portions‚ and prep ingredients to save time and ensure balanced nutrition. This approach helps maintain consistency and reduces food waste effectively.

Creating a Weekly Meal Plan

Plan meals for the entire week‚ considering dietary goals and preferences. Include balanced macronutrients‚ variety‚ and portion control. Schedule grocery shopping and prep sessions. Use reusable containers for organization. Adjust based on feedback and preferences to maintain consistency. This structured approach ensures healthy‚ delicious meals are ready‚ reducing last-minute decisions and waste. Incorporate seasonal ingredients for freshness and cost-efficiency. Make a grocery list to avoid impulse buys. Flexibility is key—allow for adjustments while sticking to the plan. This method promotes discipline‚ saves time‚ and supports long-term health goals effectively.

Meal Preparations Strategies for Busy Individuals

For busy individuals‚ meal prep is essential for maintaining a healthy diet. Dedicate one day a week to prepare meals‚ such as overnight oats‚ salads‚ or grilled proteins. Use simple‚ quick recipes that require minimal cooking time. Incorporate one-pot meals or sheet pan dinners for efficiency. Portion meals in reusable containers for grab-and-go convenience. Utilize a slow cooker for hands-off meal preparation. Keep ingredients like pre-washed greens‚ cooked grains‚ and roasted vegetables on hand. Stay hydrated by carrying a reusable water bottle. These strategies ensure healthy eating even with a hectic schedule‚ promoting consistency and reducing mealtime stress.

Hydration and Its Impact on Nutrition

Proper hydration is essential for digestion‚ nutrient absorption‚ and maintaining energy levels. Drinking enough water supports metabolic processes and helps prevent hunger confusion‚ aiding overall nutritional balance.

Importance of Drinking Water

Importance of Drinking Water

Drinking water is vital for overall health and nutrition. It aids in digestion‚ nutrient absorption‚ and maintaining bodily functions. Even mild dehydration can impair physical performance and focus. Water helps regulate metabolism‚ supports weight loss‚ and keeps skin healthy. Rafferty’s Nutrition Guide emphasizes staying hydrated to prevent hunger confusion and maintain energy levels. Aim for at least eight glasses daily‚ adjusting for activity levels. Proper hydration enhances workout recovery and supports immune function‚ making it a cornerstone of a balanced diet and sustainable wellness routine.

Role of Fluids in Digestion and Overall Health

Fluids play a crucial role in digestion and overall health by facilitating nutrient absorption and maintaining bodily functions. Water and other fluids help break down food in the digestive tract‚ preventing constipation and ensuring proper nutrient uptake. Hydration supports healthy skin‚ joints‚ and organs‚ while also aiding in waste removal. Even mild dehydration can impair physical performance and cognitive function. Rafferty’s Nutrition Guide highlights the importance of fluids in maintaining energy levels and preventing hunger confusion. Proper hydration is essential for optimal metabolism and immune function‚ making it a vital component of a balanced diet and healthy lifestyle.

Physical Activity and Nutrition

Physical activity and nutrition work together to enhance health‚ with exercise boosting metabolism and nutrition fueling workouts. A balanced diet supports muscle recovery and energy levels.

Combining Exercise with Proper Nutrition

Combining regular exercise with a well-balanced diet is essential for achieving fitness goals. Proper nutrition fuels workouts‚ enhances endurance‚ and supports muscle recovery. A calorie deficit‚ paired with macronutrient tracking‚ helps manage weight effectively. Incorporating both cardio and strength training promotes overall physical health. Staying hydrated and timing meals appropriately maximizes performance. Rafferty’s Nutrition Guide emphasizes the importance of consistency and balance‚ ensuring that physical activity and nutrition work hand-in-hand to improve health and maintain a sustainable lifestyle. This holistic approach fosters long-term wellness and helps individuals reach their full potential.

Role of Cardio and Weight Training

Cardiovascular exercise‚ such as running or cycling‚ enhances heart health and burns calories‚ while weight training builds muscle and boosts metabolism. Both are essential for a balanced fitness routine. Cardio improves endurance‚ aiding in long-term weight management‚ while strength training increases muscle mass‚ which further supports calorie burning at rest. Rafferty’s Nutrition Guide recommends combining these exercises with a tailored diet to maximize results. This dual approach ensures overall physical fitness‚ improves mental well-being‚ and supports sustainable health goals. Balancing cardio and weight training creates a holistic fitness plan that enhances both strength and endurance.

Mindful Eating Practices

Mindful eating involves savoring food‚ avoiding distractions‚ and listening to hunger cues to foster a healthier relationship with meals and reduce overeating.

Understanding Hunger and Fullness Cues

Recognizing hunger and fullness cues is vital for mindful eating. Hunger signals‚ like stomach growling or lightheadedness‚ prompt eating‚ while fullness cues‚ such as discomfort or sluggishness‚ signal stopping. Emotional eating can blur these signals‚ leading to overeating. By tuning into physical sensations and avoiding distractions‚ individuals can eat intuitively‚ fostering a healthier relationship with food and preventing overconsumption. This practice supports balanced nutrition and sustainable weight management‚ aligning with Rafferty’s Nutrition Guide principles.

Avoiding Distractions During Meals

Avoiding Distractions During Meals

Avoiding distractions during meals enhances dining experiences and improves digestion. Common distractions like TV‚ phones‚ or conversations can lead to mindless eating and poor digestion. To minimize this‚ create a calm environment‚ eat slowly‚ and focus on your food. Mindful eating helps you savor flavors and recognize fullness cues‚ preventing overeating. Rafferty’s Nutrition Guide emphasizes the importance of being present during meals to enjoy food fully and maintain a healthy relationship with eating. By reducing distractions‚ individuals can better appreciate their meals and foster a more balanced approach to nutrition.

Nutrition for Special Diets

Rafferty’s Nutrition Guide provides tailored advice for vegetarian‚ vegan‚ and allergy-friendly diets‚ ensuring balanced nutrition and essential nutrients for diverse dietary needs and preferences.

Vegetarian and Vegan Options

Rafferty’s Nutrition Guide emphasizes the importance of plant-based diets‚ offering tailored advice for vegetarians and vegans. It highlights key sources of plant-based proteins like legumes‚ beans‚ and tofu‚ ensuring adequate nutrition. The guide also focuses on whole grains‚ fruits‚ and vegetables‚ providing balanced meal ideas. For vegans‚ it stresses the importance of supplements like B12 and iron. Practical tips for meal planning and avoiding nutrient deficiencies are included‚ making it easier to adopt and maintain a plant-based lifestyle. The guide also addresses common challenges‚ such as dining out and social eating‚ with creative solutions.

Dietary Restrictions and Allergies

Rafferty’s Nutrition Guide addresses dietary restrictions and allergies with tailored strategies. It provides guidance for managing gluten-free‚ lactose-free‚ and low-FODMAP diets‚ ensuring nutrient balance. The guide emphasizes label reading and ingredient awareness to avoid allergens like nuts‚ dairy‚ and shellfish. It also offers substitute ingredients for common allergens‚ helping individuals maintain variety in their meals. Additionally‚ the guide covers psychological aspects‚ such as stress related to dietary limitations‚ and offers practical tips for navigating social and dining challenges. This section ensures that individuals with restrictions can enjoy a nutritious and satisfying diet without compromising their health or lifestyle.

Resources and Support

Rafferty’s Nutrition Guide provides access to online tools‚ meal trackers‚ and community forums. These resources help individuals stay motivated‚ track progress‚ and connect with like-minded individuals for support.

Online Tools for Tracking Nutrition

Rafferty’s Nutrition Guide recommends utilizing online tools like calorie counters and macronutrient trackers to monitor daily intake. These platforms allow users to log meals‚ set goals‚ and analyze progress. Features such as barcode scanning‚ recipe databases‚ and customizable meal plans simplify the process. Additionally‚ hydration trackers and reminders ensure proper fluid intake. Digital tools provide transparency and accountability‚ helping users maintain consistency. They also offer insights into nutritional balances‚ enabling informed decisions. By leveraging technology‚ individuals can streamline their nutrition journey‚ making healthy choices more manageable and sustainable over time.

Community Support for Healthy Eating

Rafferty’s Nutrition Guide highlights the importance of community support in fostering healthy eating habits. Joining online forums‚ local nutrition groups‚ or wellness communities can provide motivation and accountability. Sharing meal ideas‚ challenges‚ and successes with like-minded individuals creates a supportive environment. Community initiatives‚ such as group meal preps or workshops‚ further encourage adherence to nutritional goals. Rafferty’s approach emphasizes the value of collective efforts‚ where individuals inspire and learn from one another‚ making the journey to healthier eating more enjoyable and sustainable. This sense of belonging helps individuals stay committed to their wellness journey.

Rafferty’s Nutrition Guide provides a comprehensive approach to healthy eating‚ emphasizing balanced meals‚ hydration‚ and physical activity. It offers practical strategies for sustainable weight management and overall wellness‚ inspiring individuals to maintain healthy habits for long-term benefits.

Summarizing Key Takeaways

Rafferty’s Nutrition Guide emphasizes balanced eating through calorie deficit‚ macronutrient tracking‚ and hydration. It highlights the importance of proteins‚ carbs‚ and fats for energy and muscle repair. Meal planning and mindful eating practices‚ such as avoiding distractions‚ are encouraged. Physical activity‚ including cardio and weight training‚ complements nutrition for optimal health. The guide also addresses special diets like vegetarian and vegan options‚ ensuring inclusivity. By combining practical strategies with community support‚ Rafferty’s Nutrition Guide equips individuals with tools for sustainable‚ healthy habits and long-term wellness.

Motivation for Sustained Healthy Habits

Adopting Rafferty’s Nutrition Guide fosters a mindset of consistency and self-care. Celebrate small victories‚ like increased energy or improved digestion‚ to stay motivated. Remember‚ healthy habits are a journey‚ not a destination. Surround yourself with supportive communities and track progress to maintain momentum. Reward yourself for milestones achieved‚ reinforcing the positive impact of your efforts. By focusing on long-term benefits‚ such as enhanced well-being and vitality‚ you’ll find the drive to sustain healthy habits. Embrace the process and enjoy the transformative power of nutrition and lifestyle changes.

Byjacquelyn

utipia guide

Welcome to the Utopia Guide, your comprehensive resource for navigating the vast world of Utopia․ This guide covers gaming strategies, travel tips, product reviews, and more, ensuring a seamless experience for both newcomers and experienced users․ Discover practical advice, hidden gems, and expert insights to enhance your journey and achieve success in every aspect of Utopia․

Overview of Utopia Guide

The Utopia Guide is a comprehensive resource designed to assist users in navigating various aspects of Utopia, whether it’s gaming, travel, or product reviews․ This guide provides detailed insights into taming mounts like the Black Pig and Sky Ray, offering step-by-step instructions for gamers․ For travelers, it explores destinations such as Long Island and the Red Sea, highlighting hidden gems and sustainable practices․ Product enthusiasts will find reviews on items like the Waterproof Bamboo Mattress Protector and the Utopia Car with a seven-speed manual gearbox․ Additionally, the guide caters to TTRPG fans with illustrated resources and tips for successful stewardship․ By combining practical advice, expert tips, and real-world applications, the Utopia Guide aims to enhance user experiences across multiple domains, making it an indispensable tool for both newcomers and seasoned explorers․ Its diverse content ensures there’s something for everyone, fostering success and enjoyment in every endeavor․

Importance of Utopia Guide

The Utopia Guide serves as an essential tool for individuals seeking to maximize their experiences across various domains․ Its importance lies in its ability to provide comprehensive, up-to-date information tailored to different interests and needs․ Gamers benefit from detailed strategies and walkthroughs, such as taming mounts or solving puzzles, which streamline their progress and enhance gameplay․ Travelers gain valuable insights into destinations, enabling them to explore sustainably and efficiently․ Product reviews offer consumers reliable recommendations, helping them make informed purchasing decisions․ For TTRPG enthusiasts, the guide provides illustrated resources and expert tips, fostering creativity and success․ By addressing multiple aspects of Utopia, the guide becomes a one-stop solution for users, ensuring they are well-equipped to navigate and excel in their chosen paths․ Its versatility and thoroughness make it an indispensable resource for achieving success and enjoyment․

Structure of the Utopia Guide

The Utopia Guide is organized into clear, distinct sections designed to cater to diverse interests and needs․ It begins with an introduction to Utopia, providing an overview and highlighting its importance․ The guide is then divided into Game Guides, offering detailed strategies for tasks like taming mounts and solving puzzles, along with tips for success and defense․ Travel Guides follow, featuring destinations like Long Island and the Red Sea, alongside specialized guides for LGBTQ+ travelers․ Product Reviews provide insights into items such as bedding and car features, aiding informed purchasing decisions․ For TTRPG enthusiasts, resources like the Utopia TTRPG V0․1 Illustrated Guide and stewardship tips are included․ Each section is structured to ensure a logical flow, from basic to advanced topics, making the guide comprehensive and user-friendly for a wide audience․

Game Guides

The Utopia Guide offers comprehensive strategies and tips for mastering the game, including taming rare mounts, solving puzzles, and optimizing gameplay mechanics to enhance your overall experience․

How to Tame a Black Pig in Utopia Origin

Taming a Black Pig, also known as Piggiemon, in Utopia Origin is an exciting achievement․ To begin, ensure you have the necessary items, such as Special Fruits or Taming Collars, which can be found in specific locations or purchased from in-game markets․ Approach the Black Pig calmly and use your taming tool to initiate the process․ Be patient, as taming can take multiple attempts․ Once successful, the Black Pig will become your loyal mount, offering increased mobility and unique abilities․ This guide provides detailed steps and tips to help you master the art of taming this elusive creature and enhance your gameplay experience․

How to Tame a Sky Ray in Utopia Origin

Taming a Sky Ray in Utopia Origin is a rewarding challenge that requires strategy and patience․ First, locate the Sky Ray in its designated area, often found near elevated platforms or open skies․ To begin taming, ensure you have the necessary items, such as Glow Sticks or Taming Lures, which can be crafted or purchased from in-game vendors․ Approach the Sky Ray slowly to avoid startling it, then use your taming tool to initiate the process․ The Sky Ray may resist, so persistence is key․ Once tamed, the Sky Ray serves as a swift and agile mount, granting you access to hard-to-reach areas․ This guide provides a step-by-step walkthrough to help you successfully tame this majestic creature and unlock its full potential in the game․

RAFT Utopia Walkthrough Guide

Navigating RAFT Utopia can be an exciting yet challenging experience․ This guide provides a detailed walkthrough to help you solve every puzzle, locate hidden notes, and discover blueprint locations․ Start by exploring the map thoroughly, as many puzzles are hidden in plain sight․ Use your tools wisely and pay attention to environmental clues, which often hint at the next step․ For note locations, check abandoned buildings and hidden compartments, as these areas are rich with lore and useful information․ Blueprint locations are often tied to completing specific tasks or defeating bosses, so focus on progression to unlock them․ This guide ensures a fast and straightforward journey, allowing you to enjoy the game without getting stuck․ Follow these steps to master RAFT Utopia and uncover all its secrets effortlessly․

Beginner’s Guide to Choosing Race and Personality

Choosing the right race and personality is a crucial step in your Utopia journey․ Each race offers unique benefits, such as enhanced resource generation or improved military strength․ For example, certain races excel at diplomacy, while others thrive in warfare․ Personalities further customize your experience, influencing interactions and skill development․ Traits like “Ambitious” or “Pacifist” shape your kingdom’s identity and gameplay style․ Consider your playstyle: do you prefer building alliances, conquering lands, or focusing on economy? Research each race and personality combination to align with your goals․ This guide provides insights into the strengths and weaknesses of each option, helping you make an informed decision․ By selecting the right race and personality, you’ll set a strong foundation for success in Utopia․

Recommended Defense Strategies

Building a strong defense is essential for survival in Utopia․ Start by prioritizing the construction of guilds and towers, as these provide critical protection against invasions․ Ensure your walls are well-maintained and upgraded regularly to withstand enemy attacks․ Utilize your race-specific abilities and personality traits to enhance defensive capabilities․ For instance, certain races have innate bonuses that boost defense or resource generation, which can be vital during sieges․ Additionally, activate your province’s special skill to gain temporary bonuses, such as increased defense or resource production․ Explore nearby areas strategically to gather resources without overextending, as this can leave your province vulnerable․ Balance offense and defense to avoid being an easy target․ By implementing these strategies, you’ll create a formidable defense system that secures your province and ensures long-term success in Utopia․

Quick Tips for Success

To thrive in Utopia, adopt a strategic approach and stay proactive․ Begin by focusing on resource production to fuel your province’s growth․ Balance exploration with defense, ensuring you gather essential materials without overextending․ Prioritize upgrading your guilds and towers early on, as these are crucial for defense․ Utilize your race-specific abilities and personality traits to maximize efficiency․ Activate special skills during critical moments to gain temporary advantages․ Engage in regular attacks to expand your influence but avoid unnecessary risks․ Stay informed about the latest updates and patches to adapt your strategies effectively․ By following these quick tips, you’ll establish a strong foundation and pave the way for long-term success in the world of Utopia․ Regularly review your progress and adjust your tactics to maintain a competitive edge․

Commonly Used Acronyms

Understanding common acronyms in Utopia is essential for effective gameplay and communication․ OOP stands for “Out of Protection,” referring to a state where your province is vulnerable to attacks․ RFM means “Resource, Factory, and Market,” crucial for managing economic growth․ TTRPG stands for “Tabletop Role-Playing Game,” linking to the immersive storytelling section․ XP denotes “Experience Points,” earned through quests and battles to level up․ HP is “Hit Points,” indicating health in combat․ These acronyms are frequently used in guides, forums, and strategies, so familiarizing yourself with them will enhance your Utopia experience․

Travel Guides

Explore diverse destinations with the Utopia Guide, featuring insights into Long Island, Solarpunk futures, and the Red Sea․ Discover vibrant cultures, sustainable travels, and hidden gems across Asia and beyond․

A Utopia Guide to Long Island

Long Island, located in the New York metropolitan area, is a vibrant destination rich in history, culture, and natural beauty․ This Utopia Guide to Long Island offers insights into its stunning beaches, picturesque vineyards, and eclectic dining scenes․ Explore the Hamptons, known for luxury and charm, or visit Montauk, a serene coastal escape․ The island boasts diverse ecosystems, from the North Shore’s Gold Coast to the South Shore’s pristine beaches․ Discover historic sites like the Sagamore Hill and the Vanderbilt Museum, or enjoy outdoor activities such as hiking and biking in the Suffolk County Parks․ Whether you’re seeking relaxation, adventure, or cultural experiences, Long Island has something for everyone․ This guide provides detailed recommendations for accommodations, dining, and must-visit spots, ensuring a memorable journey․ Use this guide to uncover the hidden gems and make the most of your Long Island adventure․

Solarpunk Guide: From Dystopia to Utopia

Solarpunk is a visionary movement that imagines a sustainable, equitable, and optimistic future, where humanity thrives in harmony with nature and technology; This Solarpunk Guide explores the transition from dystopian challenges to a utopian society, emphasizing renewable energy, eco-friendly architecture, and community-driven innovation․ It highlights the importance of art, fashion, and culture in creating a vibrant, inclusive world․ Discover practical steps to adopt Solarpunk principles, such as integrating green spaces, reducing waste, and fostering collaboration․ Whether you’re designing a city or transforming your lifestyle, this guide offers inspiring ideas and resources to help you build a brighter future․ By embracing Solarpunk’s ideals, you can contribute to a world where technology and nature coexist in perfect balance․ Let this guide illuminate your path toward a sustainable and utopian tomorrow․

Exploring Utopia in the Red Sea

Utopia in the Red Sea is a stunning coral-protected destination, offering an idyllic escape for travelers seeking adventure and relaxation․ This enchanting island, partially submerged by the sea, is renowned for its vibrant marine life and pristine beaches․ Snorkeling and diving enthusiasts will find paradise among the colorful coral reefs teeming with exotic fish․ The island’s unique landscape and serene atmosphere make it a perfect spot for eco-tourism․ Visitors can explore the surrounding waters, enjoy luxurious accommodations, or simply bask in the sun on its untouched shores․ With its breathtaking natural beauty and tranquil ambiance, Utopia in the Red Sea is a must-visit destination for anyone looking to experience a true tropical utopia․ Whether you’re an adventurer or a relaxation seeker, this island promises unforgettable memories and a deep connection with nature․

Gay and Lesbian Travel Guide to Asia

The Gay and Lesbian Travel Guide to Asia is an essential resource for LGBTQ+ travelers exploring the diverse and vibrant cultures of the continent․ This comprehensive guide covers 16 countries, including the Philippines, Sri Lanka, Mongolia, and Nepal, providing detailed listings of LGBTQ+-friendly accommodations, bars, discos, and organizations․ It also highlights spas, restaurants, and local events, ensuring a welcoming experience for all travelers․ The guide is particularly noted for its sensitivity and depth, offering insights into the unique challenges and opportunities for LGBTQ+ individuals in each region․ Whether you’re exploring the cosmopolitan cities of Singapore, Malaysia, and Indonesia or discovering the lesser-known gems of Asia, this guide is your go-to companion for a safe and enriching journey․ It blends cultural exploration with practical advice, making it indispensable for any LGBTQ+ traveler in Asia․

Exploring 12 Cities in Asia

The Utopia Guide invites you to explore 12 vibrant cities across Asia, including Taipei, Kaohsiung, Tainan, and Taichung․ This detailed guide provides insights into the cultural, historical, and modern attractions of each city, making it a must-have for travelers․ From bustling streets to serene landscapes, discover the unique charm of each destination․ The guide also lists organizations, bars, discos, and accommodations, ensuring a seamless experience for LGBTQ+ travelers․

Explore the rich culinary scenes, visit renowned spas, and immerse yourself in the local culture․ Whether you’re seeking adventure or relaxation, this guide offers unparalleled insights into Asia’s diverse urban landscapes․ It’s a perfect blend of travel tips and cultural exploration, helping you make the most of your journey through these captivating cities․ Let the Utopia Guide be your trusted companion as you uncover the beauty and vibrancy of Asia․

Product Reviews

Discover top-rated products with the Utopia Guide․ The Waterproof Bamboo Mattress Protector offers eco-friendly protection, while the Utopia Car’s seven-speed manual gearbox delivers a smooth, engaging drive․

Utopia Bedding Waterproof Bamboo Mattress Protector

The Utopia Bedding Waterproof Bamboo Mattress Protector is a must-have for any bed․ Made from premium bamboo fabric, it offers a soft, breathable, and eco-friendly solution for protecting your mattress․ Its waterproof design ensures spills and accidents are contained, while the hypoallergenic properties make it ideal for sensitive skin․ Available in various sizes, including Twin, Twin XL, Full, Queen, and King, this protector fits most standard mattresses․ Priced affordably, starting at $16․99 for a Twin, it provides exceptional value without compromising on quality․ The slim design maintains the comfort of your mattress, and the easy-care instructions make maintenance a breeze․ Whether you’re looking to safeguard your investment or enhance your sleeping environment, this protector is a practical and stylish choice․

Utopia Car Review: Seven-Speed Manual Gearbox

The Utopia Car featuring a seven-speed manual gearbox is a standout in its class, offering a unique blend of performance and driver engagement․ Designed for enthusiasts, this gearbox delivers a smooth and precise shifting experience, with just the right amount of effort required to feel mechanically connected to the vehicle․ Paired with an 852-hp twin-turbo V-12 engine, the Utopia showcases exceptional power delivery and control․ Unlike older manual supercars with heavy clutch pedals, the Utopia’s gearbox is light and intuitive, making it accessible for both novice and experienced drivers․ Its sleek design and responsive handling make it a joy to drive, whether on city streets or open highways․ The seven-speed manual gearbox is a testament to the car’s commitment to blending modern performance with timeless driving purism, appealing to those who value the connection between driver and machine․ This car is a must-try for anyone seeking a distinctive driving experience․

TTRPG Resources

Discover essential tools for your tabletop role-playing games with the Utopia TTRPG V0․1 Illustrated Guide and Resources for Successful Stewards․ These resources provide insights and strategies to help you create and manage powerful cities, ensuring your gaming experience is both engaging and rewarding․

Utopia TTRPG V0․1 Illustrated Guide

The Utopia TTRPG V0․1 Illustrated Guide is a comprehensive resource for tabletop role-playing game enthusiasts․ Designed to enhance your gaming experience, this guide offers detailed insights into character creation, world-building, and gameplay mechanics․

It includes illustrated maps, character profiles, and tips for creating immersive storylines․ Players can explore diverse races, personalities, and kingdoms, each with unique traits and strategies․

The guide also provides resources for successful stewards, helping you manage cities, optimize defenses, and expand your influence․ Whether you’re a newcomer or an experienced player, this illustrated guide is essential for mastering the world of Utopia․

Download the Utopia TTRPG V0․1 Illustrated Guide as a free PDF to unlock its full potential and embark on unforgettable adventures․

Resources for Successful Stewards

The Resources for Successful Stewards section provides essential tools and strategies for managing and thriving in Utopia․ Whether you’re aiming to build a prosperous city or maintain harmony within your kingdom, this guide offers practical advice․

Discover tips for optimizing resource allocation, defending your territory, and expanding your influence․ Learn how to balance growth with sustainability, ensuring long-term success․

This section also includes insights into fostering alliances, resolving conflicts, and creating a utopian society․ With detailed strategies and real-world examples, it equips stewards with the knowledge to overcome challenges and achieve their goals․

Perfect for both newcomers and seasoned players, these resources are indispensable for anyone striving to create a thriving and harmonious community in Utopia․

The Utopia Guide offers a comprehensive roadmap for success, covering strategies, exploration, and optimization․ By applying these insights, you can enhance your journey and achieve your goals․ Good luck on your path to utopia!

Final Thoughts on Utopia Guide

The Utopia Guide is an invaluable resource for anyone seeking to explore and master the world of Utopia․ Whether you’re a seasoned player or a new traveler, this guide provides essential insights and tips to enhance your experience․ From taming mounts like the Black Pig and Sky Ray to understanding race choices and defense strategies, it covers every aspect of the game․ Additionally, the travel guides offer a wealth of information for exploring destinations like Long Island and the Red Sea, making it a must-have for adventurers․ The product reviews, such as the Utopia Bedding Mattress Protector and Car Review, ensure you make informed decisions․ With its comprehensive coverage, the Utopia Guide is your ultimate companion for success and enjoyment in Utopia․

Byjacquelyn

bmx bottom bracket size guide

This guide helps riders understand BMX bottom bracket sizing, ensuring compatibility and smooth pedaling. Correct size selection is crucial for optimal performance and longevity of your bike.

Overview of Bottom Brackets in BMX Bikes

A bottom bracket is a critical component in BMX bikes, connecting the crankset to the frame and enabling smooth pedaling. It consists of bearings, a spindle, and cups that house these components. The bottom bracket’s design and size significantly impact the bike’s performance, durability, and overall ride quality. BMX bottom brackets are tailored to specific riding styles, such as freestyle, race, or dirt jump, and vary in size to accommodate different frame designs and crank systems.

Standard sizes include American (51mm), Mid (41mm), Spanish (37mm), and Euro (35mm), each designed for compatibility with particular frames and crank spindles. Proper alignment and installation ensure optimal functionality, while materials like sealed cartridges or loose ball bearings offer varying levels of maintenance and durability. Understanding bottom brackets is essential for riders to optimize their bike’s performance and ensure a smooth, efficient ride.

Importance of Correct Bottom Bracket Sizing

Correct bottom bracket sizing is essential for ensuring smooth pedaling, optimal performance, and preventing potential damage to your bike. A properly fitted bottom bracket guarantees compatibility with your frame and crankset, eliminating issues like poor fit or malfunction. Incorrect sizing can lead to inefficient power transfer, increased wear on components, and even frame damage over time. Proper sizing also enhances ride quality, providing better handling and responsiveness. Additionally, it simplifies maintenance, as ill-fitting bottom brackets are more prone to issues requiring frequent adjustments or repairs. By choosing the right size, riders can enjoy a more durable, efficient, and enjoyable riding experience tailored to their specific bike and riding style.

Types of BMX Bottom Brackets

BMX bottom brackets come in four main styles: American (51 mm), Mid (41 mm), Spanish (37 mm), and Euro (35 mm threaded). Each type differs in outer bearing diameter and frame compatibility.

American Bottom Bracket (51 mm)

The American Bottom Bracket (51 mm) is the largest and most common type, widely used in standard BMX bikes. It features a 51 mm outer bearing diameter, making it compatible with frames designed for this size. This style is often found in entry-level and older BMX models, offering a reliable and durable option for riders. The American BB typically uses a 19 mm or 22 mm spindle size, ensuring compatibility with a variety of cranksets. Its larger size provides stability and strength, making it suitable for heavy-duty riding. Proper installation and maintenance are essential to ensure smooth performance and longevity. This bottom bracket is a popular choice for its simplicity and widespread compatibility.

Mid Bottom Bracket (41 mm)

The Mid Bottom Bracket (41 mm) is a versatile and widely used size in modern BMX bikes, especially in mid to high-level models. Its 41 mm outer bearing diameter strikes a balance between strength and weight, making it ideal for both freestyle and racing applications. This bracket is compatible with frames designed for mid-sized bearings and works seamlessly with 19 mm or 22 mm spindle sizes. The Mid BB is known for its durability and smooth performance, offering a middle ground between the larger American and smaller Spanish or Euro brackets. It is a preferred choice for riders seeking a blend of stability and responsiveness. Proper installation ensures optimal performance and extends the lifespan of the component.

Spanish Bottom Bracket (37 mm)

The Spanish Bottom Bracket (37 mm) is a smaller-sized option, commonly used in older or specialized BMX frames. Its 37 mm outer bearing diameter makes it suitable for frames designed with narrower bottom bracket shells. This bracket is often preferred for its lighter weight and compact design, which can enhance maneuverability in certain riding styles. The Spanish BB is compatible with specific spindle sizes, typically 19 mm or 22 mm, and is frequently found in freestyle or race bikes requiring precise handling. While less common than Mid or American brackets, it remains a reliable choice for riders with frames that require this specific size. Proper installation ensures smooth pedaling and optimal performance for the intended applications.

Euro Bottom Bracket (35 mm Threaded)

The Euro Bottom Bracket (35 mm Threaded) is a compact and lightweight option, primarily used in high-performance race frames. Its 35 mm outer bearing diameter and threaded design make it ideal for frames with specific threading requirements; This bracket is known for its durability and smooth operation, often paired with 19 mm or 22 mm spindle sizes. The Euro BB is less common in modern BMX bikes but remains popular among racers seeking precise control and efficiency. Its threaded system ensures secure installation, reducing the risk of movement over time. While it may require more precise frame compatibility, the Euro Bottom Bracket offers excellent performance for riders who need a reliable and responsive setup in competitive environments.

Size Charts and Compatibility

Size charts and compatibility ensure proper fitting of bottom brackets with frames and cranks. Matching spindle sizes (19mm, 22mm, 24mm) is essential for optimal performance and durability.

Bottom Bracket Size Chart by Type

The bottom bracket size chart organizes sizes by type, ensuring compatibility. American (51mm) is the largest, commonly used in older or entry-level bikes. Mid (41mm) is popular in mid to high-level BMX bikes, offering a balance between durability and weight. Spanish (37mm) and Euro (35mm threaded) are smaller, typically found in specialized frames, especially race bikes. Each size corresponds to the outer bearing diameter, crucial for proper frame fit. Always cross-reference your frame and crank spindle size to avoid compatibility issues. This chart simplifies the selection process, ensuring riders choose the right bottom bracket for their setup. Proper sizing enhances performance and prevents premature wear.

Spindle Size Compatibility (19mm, 22mm, 24mm)

Spindle size is critical for compatibility with your bottom bracket and crankset. The most common spindle sizes are 19mm, 22mm, and occasionally 24mm. A 19mm spindle is standard for most freestyle BMX bikes, offering durability and compatibility with mid and American bottom brackets. The 22mm spindle is preferred for high-performance and race bikes, pairing well with Euro and Spanish bottom brackets. A 24mm spindle is less common but used in specialized setups for added strength. Always ensure your crank spindle size matches your bottom bracket to maintain proper alignment and avoid damage. Mixing sizes can lead to poor performance or component failure. Riders should verify compatibility before installation to guarantee smooth operation and optimal bike handling.

Factors Influencing Bottom Bracket Choice

Factors influencing bottom bracket choice include bike type, such as freestyle, race, or dirt jump bikes, riding style, crank spindle size, and frame compatibility, ensuring proper fit and optimal performance.

Bike Type and Riding Style (Freestyle, Race, Dirt Jump)

The type of BMX bike and riding style significantly influence the choice of bottom bracket. For freestyle BMX, durability and strength are key, often favoring mid or American bottom brackets. Race BMX bikes prioritize lightweight and efficiency, commonly using euro or Spanish bottom brackets for lower weight and faster acceleration. Dirt jump BMX requires a balance between durability and performance, with mid bottom brackets being a popular choice due to their compatibility with various crank spindle sizes. Each riding style demands specific features, ensuring optimal performance and longevity of the bike. Proper selection enhances the overall riding experience, whether in the streets, on the track, or off-road.

Crank Spindle Size and Bottom Bracket Matching

Crank spindle size plays a critical role in selecting the right bottom bracket. Common spindle sizes include 19mm, 22mm, and occasionally 24mm, with each requiring a specific bottom bracket to ensure proper fitment. For instance, a 19mm spindle is often paired with a mid bottom bracket, while a 22mm spindle is commonly used with American or Euro bottom brackets. Mismatching spindle and bottom bracket sizes can lead to poor performance, increased wear, or even damage to the frame. Riders must verify their crankset’s spindle size before choosing a bottom bracket to maintain optimal functionality and avoid compatibility issues. This ensures smooth pedaling and long-term durability of the bike’s drivetrain. Proper matching is essential for both performance and longevity.

Frame Compatibility and Threaded/Threadless Systems

Frame compatibility is vital when selecting a bottom bracket, as different frames are designed for specific systems. Threaded bottom brackets, such as the Euro (35mm) and Spanish (37mm), require frames with internal threads in the bottom bracket shell. These systems are often found in older or race-oriented frames. In contrast, threadless systems, like the American (51mm) and Mid (41mm) bottom brackets, rely on press-fit designs, which are more common in modern BMX frames. Mismatching these systems can result in poor fitment or even frame damage. Always verify your frame’s specifications to ensure compatibility. Proper installation and maintenance of these systems are crucial for optimal performance and longevity. Understanding these differences helps riders make informed decisions tailored to their bike’s design.

How to Measure and Select the Right Size

Measure your frame’s bottom bracket shell width and match it with the correct spindle size for optimal compatibility. Correct fitment ensures smooth pedaling and prevents damage.

Measuring Your Frame for Bottom Bracket Size

To determine the correct bottom bracket size for your BMX bike, start by measuring the width of your frame’s bottom bracket shell. Use a pair of calipers to accurately measure the distance between the inner surfaces of the shell. This measurement will help identify whether you need an American (51 mm), Mid (41 mm), Spanish (37 mm), or Euro (35 mm) bottom bracket. Ensure the measurement is precise, as incorrect sizing can lead to poor fitment and performance issues. Additionally, consider the spindle size of your crankset, as it must match the bottom bracket’s spindle diameter (19 mm, 22 mm, or 24 mm). Proper alignment and fitment are critical for smooth pedaling and preventing frame damage.

Understanding Threaded vs. Threadless Bottom Brackets

Threaded bottom brackets feature internal threads in the frame’s bottom bracket shell, allowing the bracket to screw into place. This design is common in older BMX frames and provides a secure fit when installed correctly. Threadless bottom brackets, on the other hand, are pressed into the frame without threading, relying on precise frame tolerances for proper installation. Threaded systems are generally easier to install and adjust, while threadless systems offer a cleaner look and are often lighter. Always ensure your frame is compatible with the type of bottom bracket you choose, as mixing threaded and threadless systems can lead to poor fitment or damage. Proper installation tools are essential for both types to avoid stripping threads or misaligning the bracket.

Installation and Maintenance Tips

Proper installation involves using the correct tools and following torque specifications. Regularly clean and grease threads to prevent corrosion. Replace worn-out bearings or seals promptly for smooth operation. Always ensure compatibility between the bottom bracket and frame type. Inspect and maintain your bottom bracket regularly to avoid performance issues and extend its lifespan. Seek professional advice if unsure about installation or compatibility to ensure optimal functionality and safety while riding.

Proper Installation Techniques

Installing a BMX bottom bracket requires precision to ensure optimal performance. Start by cleaning the frame’s bottom bracket shell thoroughly. Apply a thin layer of grease to the threads to prevent corrosion. For threaded bottom brackets, use the appropriate tool to screw the cups into place, ensuring they are snug but not over-tightened. Align the spindle with the frame’s center to avoid misalignment. Tighten the cups evenly, following the manufacturer’s torque specifications. For threadless systems, use specialized tools to press the bearings into place. Double-check all bolts and ensure the crank arms spin smoothly. Proper alignment and torque are critical to prevent damage and ensure smooth pedaling. Always refer to the manufacturer’s instructions for specific installation requirements. Regularly inspect and maintain the bottom bracket to extend its lifespan. Professional installation is recommended for complex systems or if you’re unsure about the process.

Maintenance for Longevity and Performance

Regular maintenance is essential to ensure your BMX bottom bracket performs optimally and lasts longer. Start by cleaning the area around the bottom bracket to remove dirt and debris. Use a clean cloth and mild solvent to wipe down the spindle and bearings. Lubricate the moving parts with a high-quality grease or oil to reduce friction and prevent corrosion. Inspect the bearings for wear or damage and replace them if necessary. Check the tightness of all bolts and ensure they are torqued to the manufacturer’s specifications. For threaded bottom brackets, apply a small amount of grease to the threads during installation to prevent rust. Regularly cleaning and lubricating your bottom bracket will help maintain smooth pedaling and prevent premature wear. Consistent upkeep ensures your bike runs efficiently and extends the life of the components.

Understanding BMX bottom bracket sizing ensures a smooth ride and optimal performance. Correct sizing, compatibility, and proper installation are key for longevity and efficiency. Always maintain your bottom bracket to extend its life. Choose wisely for enhanced biking experiences.

BMX bottom brackets come in four main types: American (51 mm), Mid (41 mm), Spanish (37 mm), and Euro (35 mm). Each size refers to the bearing’s outer diameter. Correct sizing ensures smooth pedaling and optimal bike performance. Compatibility with crank spindle size is crucial, as mismatched sizes can lead to poor performance or damage. Spindle sizes include 19 mm, 22 mm, and occasionally 24 mm. Proper installation and regular maintenance, such as cleaning and greasing, are essential for longevity. Riders should also consider frame compatibility and whether their system is threaded or threadless. Understanding these factors helps riders make informed decisions for their BMX setup.

Final Recommendations for Buyers

When selecting a BMX bottom bracket, ensure it matches your frame’s specifications and riding style. Compatibility with crank spindle size is crucial for smooth operation. For most modern bikes, a Mid Bottom Bracket (41 mm) is the standard, while race frames may require a Euro Bottom Bracket (35 mm). Always check whether your frame uses a threaded or threadless system. Sealed bearings are recommended for durability and low maintenance. Consider your riding style—freestyle riders may prefer a 19 mm spindle, while racers might opt for 22 mm. Consider consulting a size chart or seeking professional advice if unsure. Proper installation and regular maintenance will ensure optimal performance and longevity of your bottom bracket.

Byjacquelyn

warrior wotlk leveling guide

Warriors in WotLK are versatile and powerful‚ excelling in both tanking and dealing damage. Arms and Fury specs shine for leveling‚ with Arms offering consistent DPS and Fury excelling with dual-wielding. Protection‚ while strong in dungeons‚ is less optimal for solo leveling without heirlooms. Mastery of rotation and gear ensures efficient questing and dungeon runs‚ making Warriors a top choice for rapid progression.

1.1 Overview of the Warrior Class in Wrath of the Lich King

The Warrior is a iconic class in WotLK‚ excelling as a hybrid with robust melee capabilities. Specializing in Strength and Stamina‚ Warriors dominate both single-target and AoE scenarios. The Arms spec is ideal for leveling‚ offering consistent DPS and versatility‚ while Fury shines with dual-wielding for burst damage. Protection‚ though viable‚ is less efficient for solo leveling without heirlooms. Warriors are highly adaptable‚ making them a top choice for both tanking and dealing damage‚ with gear and talents significantly enhancing their performance in any role.

1.2 Importance of Choosing the Right Specialization

Choosing the right specialization is crucial for optimizing your Warrior’s performance in WotLK. Arms excels in dealing consistent damage and handling multiple enemies‚ making it ideal for questing and solo leveling. Fury specializes in intense burst damage with dual-wielding weapons‚ offering superior DPS in leveling and dungeon runs. Protection‚ while excellent for tanking in dungeons‚ is less optimal for solo leveling without heirlooms. Selecting the correct spec ensures smoother progression‚ aligns with your playstyle‚ and maximizes your character’s potential‚ ensuring you can tackle content effectively and enjoy the game more.

1.3 Brief History of Warrior Leveling in WoW Classic

Warriors in WoW Classic were renowned for their resilience and versatility‚ making them a popular choice for both tanking and dealing damage. Early leveling relied heavily on rage generation and basic attack rotations‚ with abilities like Heroic Strike and Overpower becoming staples. As the game evolved through expansions like The Burning Crusade‚ Warriors saw significant improvements in mobility and damage output. Wrath of the Lich King further refined their role‚ introducing runes and runeforging‚ which enhanced their combat effectiveness. This evolution solidified Warriors as a top-tier class for leveling and endgame content.

Race and Class Choices for Warrior Leveling

Choosing the right race and class combination is crucial for optimal Warrior leveling in WotLK. Alliance races like Humans and Dwarves offer beneficial racial traits‚ while Horde races such as Orcs and Tauren provide powerful abilities. Each race brings unique advantages‚ making them viable for different playstyles. Selecting a race that complements your specialization ensures a smoother leveling experience.

2.1 Best Races for Warriors in WotLK

For Warriors in WotLK‚ race choice significantly impacts leveling efficiency. Among Alliance races‚ Humans excel due to increased stamina and diplomacy‚ enhancing reputation gains. Dwarves benefit from Stoneform‚ providing defensive utility. On the Horde side‚ Orcs are optimal with Blood Fury‚ boosting attack power during combat‚ while Tauren gain increased health and stamina. Each race offers unique traits‚ but Orcs and Humans are often favored for their offensive and versatile bonuses‚ making them top picks for Warrior leveling.

2.2 Racial Abilities and Their Impact on Leveling

Racial abilities play a crucial role in leveling efficiency for Warriors in WotLK. Orcs benefit from Blood Fury‚ boosting attack power‚ while Humans gain increased stamina and diplomacy for reputation gains. Dwarves utilize Stoneform for defensive utility‚ and Tauren leverage increased health and stamina. On the Horde side‚ Undead excel with Shadow Resistance and Will of the Forsaken‚ reducing crowd control duration. These traits enhance survivability‚ damage output‚ or convenience‚ making certain races more advantageous for specific leveling styles and playstyles.

2.3 Alliance vs. Horde: Which Side to Choose for Optimal Leveling

Choosing between Alliance and Horde impacts leveling due to racial traits and starting zones. Alliance races like Draenei offer healing from Holy Shock‚ aiding solo play‚ while Dwarves gain defensive boosts. Horde races‚ such as Orcs with Blood Fury‚ enhance DPS‚ and Tauren improve health. Zones also vary‚ with Horde areas often denser in quest hubs. Ultimately‚ the choice depends on preferred playstyle and racial synergies‚ as both sides offer viable options for efficient leveling in WotLK.

Talent Builds for Warrior Leveling

Arms‚ Fury‚ and Protection specs offer unique leveling experiences. Arms excels in solo play with Impale‚ while Fury dominates with dual-wield via Blood Craze. Protection‚ though tank-focused‚ lacks solo efficiency but shines in dungeons with Shield Mastery.

3.1 Arms Talent Build for Leveling

The Arms spec is ideal for solo leveling‚ offering high single-target damage and excellent mobility. Key talents include Impale for increased crit damage‚ Juggernaut to reduce stance switching‚ and Blood Frenzy for enhanced bleeding effects. This build focuses on maximizing DPS while maintaining survivability. Arms Warriors excel at handling multiple enemies‚ making them versatile for both questing and dungeon runs. Proper talent allocation ensures consistent damage output‚ making Arms a top choice for efficient leveling in WotLK Classic.

3.2 Fury Talent Build for Leveling

Fury Warriors are relentless damage machines‚ excelling with dual-wielding weapons. Key talents include Blood Frenzy for increased damage‚ Flurry to amplify attack speed after crits‚ and Death Wish for burst damage phases. This build maximizes rage generation and DPS‚ making it ideal for aggressive players. Dual-wielding becomes increasingly effective post-level 40‚ and with heirlooms‚ Fury surpasses other specs. Proper talent allocation ensures high mobility and sustained damage output‚ making Fury a top choice for fast-paced‚ dynamic leveling in WotLK Classic.

3.3 Protection Talent Build for Leveling

Protection Warriors are formidable tanks‚ excelling in dungeon leveling and group content. Key talents include Shield Specialization for improved block chance‚ Revenge for high burst damage‚ and Incite to boost attack power. While less optimal for solo leveling‚ Protection shines in dungeons‚ providing unmatched survivability. Talents like Imp. Thunderclap and Shield Mastery enhance control and mitigation‚ making Prot ideal for tanking roles. This build ensures steady threat generation and robust defense‚ perfect for players focused on group progression in WotLK Classic.

3.4 Key Talents for Each Specialization

Each Warrior specialization requires distinct talents for optimal leveling. Arms relies on Mortal Strike for damage and Whirlwind for AoE. Fury excels with Flurry and Bloodthirst for sustained DPS. Protection focuses on Shield Specialization and Revenge for tanking dominance. While Arms and Fury are ideal for solo leveling‚ Protection shines in dungeons‚ ensuring survivability and threat generation. These talents enhance each spec’s unique role‚ making Warriors versatile and powerful in WotLK Classic‚ whether tanking or dealing damage.

Rotation and Ability Usage

Mastering ability rotations is crucial for Warriors. Arms uses Mortal Strike and Whirlwind‚ while Fury relies on Bloodrage and Bloodthirst. Protection focuses on Shield Block and Revenge for tanking; Adapting your rotation ensures efficient leveling and combat effectiveness in WotLK Classic.

4.1 Arms Warrior Rotation for Leveling

The Arms Warrior rotation focuses on maximizing damage while maintaining mobility. Start with Auto-Attacks and use Whirlwind on multiple enemies. Prioritize Mortal Strike for high damage‚ followed by Shield Slam to generate extra threat. Use Overpower after dodges for bonus damage. Maintain Battle Shout for increased attack power and utilize Hamstring to slow enemies‚ preventing excessive damage taken. This rotation ensures consistent DPS and effective leveling in WotLK Classic.

4.2 Fury Warrior Rotation for Leveling

Fury Warriors excel with dual-wield weapons‚ focusing on high attack speed and Rage generation. Open with Bloodrage to initiate combat. Use Whirlwind on multiple enemies to maintain uptime and generate Rage. Prioritize Slam to spend excess Rage while dealing significant damage. Bloodthirst should be used frequently to sustain attacks and heal; Maintain Battle Shout for increased attack power and utilize Hamstring to control enemy movement. This rotation maximizes Fury’s potential for fast and efficient leveling in WotLK Classic.

4.3 Protection Warrior Rotation for Leveling

Protection Warriors focus on survivability and efficient threat generation. Use Revenge as your primary attack‚ triggering it immediately off cooldown. Apply Shield Block before taking significant damage‚ especially against elites or multiple enemies. Maintain Taunt to control adds and prevent threat loss; Use Disarm to reduce incoming damage from enemies. Keep Rend active on targets for sustained damage. While not the highest DPS spec‚ Protection’s durability makes it ideal for solo or dungeon leveling‚ especially without heirlooms. This rotation emphasizes survival and consistent threat generation for smooth progression.

4.4 Importance of Ability Prioritization

Ability prioritization is crucial for maximizing effectiveness while leveling. Warriors must use high-damage abilities like Slam and Whirlwind on cooldown to maintain consistent DPS. Defensive cooldowns like Shield Block and Last Stand should be used strategically to enhance survivability. Properly managing rage and adapting rotations to the situation ensures optimal performance. Whether solo questing or in a group‚ prioritizing abilities based on threat generation and damage output is essential for efficient leveling and maintaining aggro in dungeons.

Gear and Equipment for Warrior Leveling

Optimizing gear is vital for Warriors. Prioritize pre-raid items‚ enchants‚ and gems to enhance strength and stamina. Crafting professions like Blacksmithing and Engineering provide powerful equipment‚ ensuring peak performance during leveling.

5.1 Best Pre-Raid Gear for Warriors

Acquiring top-tier pre-raid gear is essential for Warriors to maximize their effectiveness. Key items include the Earthbreaker Gauntlets and Valorous Siegebreaker Helm‚ which boost strength and armor. The Liadrin’s Fury and Dragon Slayer’s Axe are excellent weapon choices‚ providing high damage output. Accessories like the Embrace of the Gladiator and Ring of the Warlord enhance stamina and critical strike. Ensuring a well-rounded gear set with optimal stats will significantly improve both tanking and DPS capabilities‚ making the leveling process smoother and more efficient. Prioritizing these pieces ensures Warriors are well-prepared for endgame content.

5.2 Enchants and Gems for Optimal Performance

Optimizing your Warrior’s gear with the right enchants and gems is crucial for maximizing effectiveness. Prioritize Strength and Hit Rating gems to enhance your attack power and accuracy. For weapons‚ Greater Potency or

5.3 Crafting Professions for Warriors (Blacksmithing‚ Engineering)

Blacksmithing and Engineering are excellent crafting professions for Warriors in WotLK. Blacksmithing allows crafting powerful weapons and armor‚ enhancing your gear throughout leveling. Engineering provides access to unique trinkets and gadgets‚ such as Field Repair Bot 74A and Nitro Boosts‚ which offer repair convenience and movement speed boosts. These professions complement your progression‚ enabling you to craft essential items and maintain a competitive edge in both PvE and PvP scenarios‚ ensuring optimal performance during your journey to level 80.

5.4 Heirlooms and Their Impact on Leveling Speed

Heirlooms are highly beneficial for Warrior leveling in WotLK‚ as they scale with your character’s level‚ providing consistent stat bonuses. The Scythe of the Unworthy (axe) and Warboots of the Unworthy are considered best-in-slot Heirlooms‚ offering increased attack power and stamina. These items significantly enhance leveling efficiency by boosting damage output and survivability. Additionally‚ Heirlooms reduce the need to constantly replace gear‚ saving time and resources. While they don’t guarantee an effortless journey‚ they greatly accelerate progression‚ especially when combined with optimal rotations and strategies.

Leveling Strategies and Routes

Optimal leveling routes focus on efficient questing in zones like Howling Fjord and Borean Tundra. Questing surpasses grinding in speed‚ while dungeons accelerate XP gain. Plan your path wisely to minimize travel time and maximize XP.

6.1 Best Zones for Leveling a Warrior

The optimal zones for leveling a Warrior in WotLK include Howling Fjord‚ Borean Tundra‚ Dragonblight‚ Grizzly Hills‚ Zul’Drak‚ Sholazar Basin‚ and Icecrown. Starting with Howling Fjord or Borean Tundra provides a smooth transition into the expansion. Dragonblight and Grizzly Hills offer abundant quests and XP. Zul’Drak and Sholazar Basin are ideal for higher levels‚ while Icecrown serves as the final leveling ground. Following this progression ensures minimal travel time and maximizes XP gain‚ making your journey to level 80 efficient and streamlined.

6.2 Questing vs. Grinding: Which is More Efficient

Questing is generally more efficient for Warriors due to the abundance of XP-rich quests and gear rewards. Grinding can be viable in densely populated zones like Howling Fjord or Dragonblight‚ especially when paired with AoE specs like Fury. However‚ questing provides better loot and XP per hour‚ making it the preferred method. A mix of both approaches ensures steady progression‚ with grinding used to fill gaps between quest chains. Balancing these methods optimizes your leveling speed and keeps the process engaging.

6.3 Group vs. Solo Leveling: Pros and Cons

Solo leveling offers flexibility and independence‚ allowing Warriors to progress at their own pace without relying on others. It’s ideal for those who prefer a self-directed experience or play at unconventional hours. However‚ grouping can accelerate leveling by tackling tougher content together‚ sharing strategies‚ and gaining bonuses from party synergies. Grouping also provides social interaction‚ making the journey more enjoyable. On the downside‚ coordinating a group can be challenging‚ and loot distribution may lead to conflicts. Ultimately‚ the choice depends on personal preference and playstyle.

6.4 Utilizing Dungeons for Faster Leveling

Dungeons offer a significant boost to leveling speed‚ providing higher XP rates and better loot compared to solo questing. Running instances like Utgarde Keep or The Nexus can yield substantial experience‚ especially when coordinated with a group. Additionally‚ dungeons allow Warriors to refine their rotations and gain combat experience in a dynamic environment. However‚ downtime between pulls and the need for effective group coordination can sometimes offset the benefits. Overall‚ incorporating dungeons into your leveling strategy can accelerate progress and prepare you for endgame content.

Addons and Tools for Efficient Leveling

Addons like Zygor Guides provide optimized leveling paths‚ while tools such as Deadly Boss Mods enhance dungeon runs. These resources streamline progression‚ ensuring efficient XP gain and gear optimization.

7.1 Essential Addons for Warrior Leveling

Zygor Guides is a must-have for optimized leveling paths‚ ensuring efficient quest completion and XP gain. Deadly Boss Mods enhances dungeon runs by providing real-time boss mechanics alerts. Questie simplifies questing by highlighting objectives on the map‚ while WeakAuras helps track key abilities and cooldowns. Recount and Skada are essential for monitoring DPS and performance‚ allowing for rotation optimization. These addons collectively streamline the leveling process‚ making it faster and more efficient for Warriors in WotLK Classic.

7.2 Using Zygor Guides for Optimized Leveling

Zygor Guides is an invaluable tool for streamlining your Warrior’s leveling journey in WotLK Classic. This in-game guide provides step-by-step questing routes‚ ensuring you complete quests in the most efficient order. It minimizes travel time and maximizes XP gain‚ helping you reach level 80 faster. Zygor also offers tailored advice for Arms‚ Fury‚ and Protection specs‚ optimizing your progression based on your chosen playstyle. Its intuitive interface tracks your progress and suggests optimal routes‚ making it an essential addon for both new and experienced players aiming to level quickly and effectively.

7.3 Other Tools and Resources for Speed Leveling

Beyond Zygor‚ tools like Deadly Boss Mods and Recount enhance your gameplay by tracking cooldowns and DPS‚ optimizing your rotation. Addons such as Rested XP boost experience gain‚ while profession-focused addons like GatherMate and Auctionator streamline resource gathering and gold management. Online platforms like Icy Veins and WoWHead provide detailed talent builds‚ gear recommendations‚ and leveling strategies. These resources collectively ensure you’re well-equipped to level efficiently‚ whether focusing on Arms‚ Fury‚ or Protection‚ and help you maintain a competitive edge throughout your journey to 80.

Tips and Tricks for Warrior Leveling

Master rage management to maintain consistent DPS. Optimize rotations for maximum efficiency‚ utilize buffs like Battle Shout‚ and avoid unnecessary cooldown waste. Learn to prioritize abilities and adapt strategies for different situations to minimize downtime and maximize XP gain. Effective use of abilities and smart decision-making are key to swift leveling and overcoming challenges in WotLK.

8.1 Managing Rage and Cooldowns Effectively

Effective rage management is crucial for Warriors in WotLK. Balance offensive and defensive cooldowns to maintain consistent DPS while avoiding unnecessary rage waste. Use abilities like Bloodrage to generate initial rage and Heroic Strike to spend excess. Timing cooldowns like Recklessness and Death Wish during high-damage phases maximizes output. Proper management ensures sustained damage and efficient leveling‚ keeping your Warrior in top combat performance throughout the journey to 80.

8.2 Optimizing Your Rotation for Maximum DPS

Optimizing your Warrior’s rotation is key to maximizing DPS during leveling. For Arms‚ prioritize Slam‚ Mortal Strike‚ and Whirlwind‚ using Heroic Strike to spend excess rage. Fury focuses on dual-wielding‚ with Bloodthirst and Whirlwind as core attacks‚ while Rampage enhances burst damage. Maintain Battle Shout and Commanding Shout for consistent damage output. Use cooldowns like Recklessness and Death Wish during high-damage phases. Proper rotation ensures efficient leveling and high DPS‚ making your Warrior a formidable force in WotLK.

8.3 Avoiding Common Mistakes During Leveling

Avoiding common mistakes is crucial for efficient Warrior leveling in WotLK. Many players overlook proper ability prioritization‚ leading to suboptimal DPS. Neglecting to manage rage effectively can result in wasted potential. Forgetting to maintain buffs like Battle Shout or Commanding Shout significantly impacts performance. Over-reliance on auto-attacks or improper timing of cooldowns like Recklessness can hinder progress. Additionally‚ ignoring gear optimization or skipping key enchants and gems can slow leveling. Stay mindful of these pitfalls to ensure a smoother‚ faster journey to level 80.

8.4 Utilizing Buffs and Consumables

Buffs and consumables play a vital role in optimizing your Warrior’s performance during leveling. Always use Battle Shout or Commanding Shout to increase attack power and health. Consumables like Potion of Speed or Stamina can provide crucial boosts during intense fights or long questing sessions. Don’t forget to eat food buffs like Roasted Clefthoof for stamina or Grilled Mudfish for strength. Additionally‚ scrolls such as Scroll of Strength or Scroll of Agility can offer temporary boosts. Using flasks like Flask of Stoneform or Flask of Relentless Assault enhances survivability and DPS. Bandages and healing potions are also essential for emergencies‚ ensuring minimal downtime. Proper use of these tools significantly accelerates your leveling progress and improves efficiency in both solo and group play.

Endgame Preparation for Warriors

Prepare for endgame by gearing up through dungeons and raids‚ ensuring optimal stats for your chosen role. Review your rotation for maximum efficiency and survivability in high-level content.

9.1 Preparing for Raids and Dungeons

Preparing for raids and dungeons in WotLK requires optimizing your gear and understanding your role. Focus on acquiring pre-raid items and crafting professions like Blacksmithing for powerful equipment. Ensure your stats align with your specialization‚ with emphasis on strength and agility for DPS‚ or stamina and armor for tanking. Enchant and gem your gear appropriately for maximum effectiveness. Additionally‚ stock up on consumables like food‚ flasks‚ and potions to enhance performance. Practice your rotation and cooldown management to ensure peak efficiency in high-level content.

9.2 Gearing Up for Endgame Content

Gearing up for endgame content in WotLK involves acquiring high-quality equipment tailored to your specialization. Focus on obtaining pre-raid gear from dungeons and crafting professions like Blacksmithing. For DPS‚ prioritize Strength and Agility‚ while tanks should focus on Stamina and Armor. Enchant and gem your gear with stats that complement your role‚ such as Attack Power or Block Value. Additionally‚ utilize consumables like food buffs and flasks to maximize performance in raids and high-level dungeons.

9.3 Choosing the Right Role (Tank‚ DPS) for Endgame

Choosing the right role for endgame content depends on your playstyle and guild needs. Tanks provide stability and protection‚ excelling in Protection specialization. DPS Warriors‚ particularly Arms and Fury‚ deal high damage and are versatile. Consider your gear and experience when deciding. Tanks require strong defensive stats‚ while DPS focuses on offensive capabilities. Ensure your choice aligns with your strengths and the demands of your group to maximize effectiveness in raids and dungeons.

Mastering Warrior leveling in WotLK requires careful specialization and gear choices. With the right strategy‚ you’ll reach level 80 quickly and efficiently‚ ready for endgame challenges.

10.1 Final Tips for Successful Warrior Leveling

Consistency is key—maintain a steady rotation and manage rage effectively. Utilize heirlooms and optimal enchants to boost efficiency. Prioritize questing over grinding for faster progression. Join dungeons for diversified experience and gear. Experiment with different specs to find your preference. Stay updated with the latest guides and addons to optimize your journey. With dedication and smart strategies‚ you’ll reach level 80 efficiently and be well-prepared for endgame content.

10.2 Recap of Key Strategies and Concepts

Mastering rage management and cooldowns is vital for sustained performance. Prioritize questing over grinding for efficiency and rewards. Utilize dungeons for accelerated XP and loot. Employ addons like Zygor Guides for optimized routes and strategies. Select racial abilities that complement your playstyle. Experiment with Arms‚ Fury‚ and Protection specs to find your preference. Optimize gear with pre-raid items‚ enchants‚ and gems. Use heirlooms and rested XP to enhance leveling speed. Maintain consistent rotations for effective DPS. Adapt strategies as you progress to ensure smooth leveling. Stay informed with the latest guides and tools to maintain efficiency.