The NHS Blood Pressure Chart is a practical tool designed to help individuals monitor and track their blood pressure readings effectively. Available in PDF format, it provides a clear and organized way to record systolic and diastolic measurements, aiding in the early detection and management of hypertension. This resource is widely recommended by healthcare professionals to promote better cardiovascular health and awareness.
1.1 What is the NHS Blood Pressure Chart?
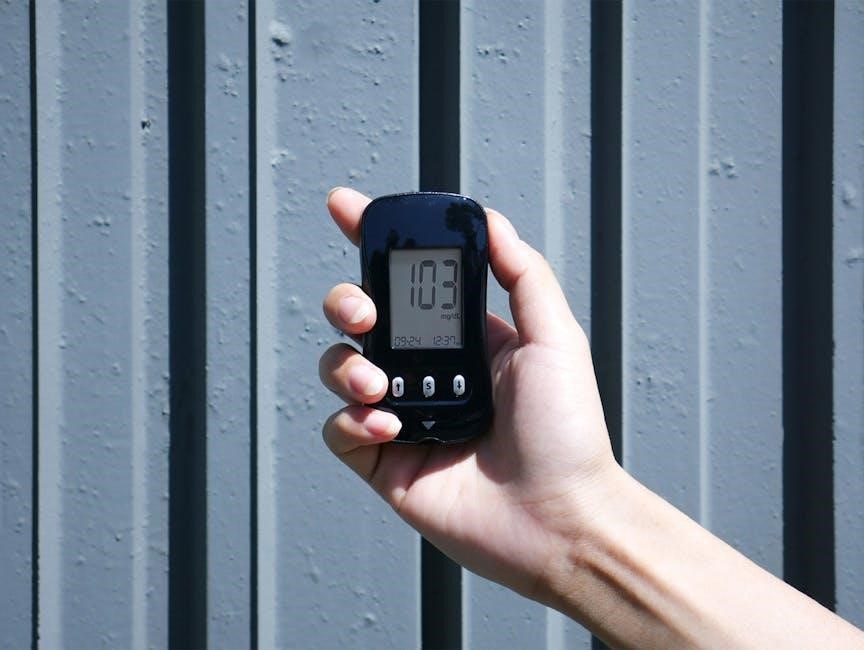
The NHS Blood Pressure Chart is a user-friendly resource provided by the National Health Service to help individuals monitor and track their blood pressure readings. It is typically available in a downloadable PDF format, making it easy to print and use at home. The chart allows users to record their systolic and diastolic measurements, providing a clear overview of their blood pressure trends over time. It also includes guidelines to help identify normal, elevated, or high blood pressure levels, serving as a valuable tool for early detection and management of hypertension. Space for notes and additional information is often included for better tracking.
1.2 Importance of Monitoring Blood Pressure
Monitoring blood pressure is essential for maintaining cardiovascular health and preventing complications. High blood pressure, or hypertension, can lead to serious conditions like stroke and heart disease if left unmanaged. Regular tracking allows early detection of abnormal readings, enabling timely medical interventions. The NHS Blood Pressure Chart helps individuals identify patterns and changes over time, facilitating better decision-making. By recording readings consistently, users can assess the effectiveness of lifestyle changes or medications. This proactive approach empowers individuals to take control of their health, reducing the risk of long-term complications and improving overall well-being.
Understanding Blood Pressure Readings
Understanding blood pressure readings is crucial for effective health monitoring. The NHS Blood Pressure Chart helps interpret systolic and diastolic values, enabling individuals to track changes and maintain healthy levels.
2.1 Systolic and Diastolic Blood Pressure Explained
Systolic blood pressure measures the force of blood against artery walls during heartbeats, while diastolic measures it between beats. Both are recorded in millimeters of mercury (mmHg). A normal reading is typically below 120/80 mmHg. Elevated levels range from 120-129 mmHg systolic, and high blood pressure starts at 130/80 mmHg or higher. The NHS Blood Pressure Chart categorizes these ranges, helping individuals understand their readings and monitor changes over time. Accurate tracking of these values is essential for early detection of hypertension and maintaining cardiovascular health.
2.2 Normal, Elevated, and High Blood Pressure Ranges
Normal blood pressure is typically below 120/80 mmHg, while elevated blood pressure ranges from 120-129 mmHg systolic and below 80 mmHg diastolic. High blood pressure is categorized as Stage 1 (130-139/80-89 mmHg) or Stage 2 (140/90 mmHg or higher). The NHS Blood Pressure Chart helps individuals identify where their readings fall within these ranges, enabling early detection of potential issues. Monitoring these levels is crucial for managing hypertension and reducing cardiovascular risks. Understanding these categories empowers individuals to take proactive steps toward maintaining healthy blood pressure levels. Regular tracking is essential for effective health management.

How to Use the NHS Blood Pressure Chart
The NHS Blood Pressure Chart guides users to record readings twice daily, note dates, and calculate averages. Follow instructions for accurate tracking and next steps.
3.1 Step-by-Step Guide to Recording Readings
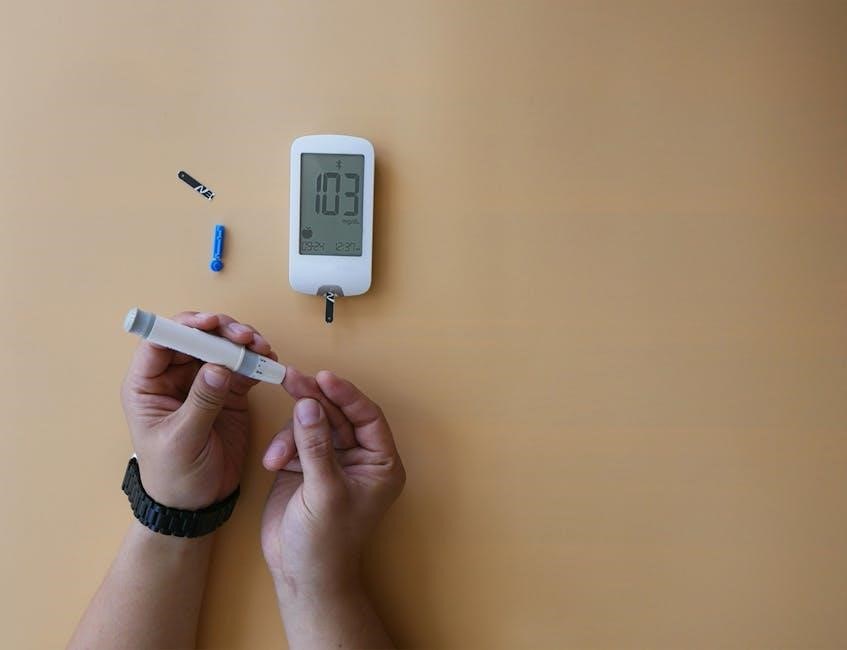
To use the NHS Blood Pressure Chart, start by preparing your diary. Take two readings daily, ideally in the morning and evening, noting the date. Record systolic and diastolic values exactly as shown on your monitor. If instructed, include pulse rate and any symptoms. After 4-7 days, calculate the average by adding readings and dividing by the number. Complete the table fully, ensuring accuracy. For lying and standing measurements, follow the guide for proper positioning. Return the completed diary to your GP for review and further advice. This structured approach ensures reliable tracking and informed decisions.
3.2 How to Interpret Your Blood Pressure Data
Using the NHS Blood Pressure Chart, compare your recorded readings against the provided ranges. Normal blood pressure is typically below 120/80 mmHg, while elevated or high readings may indicate hypertension. Calculate your average by summing readings and dividing by the number of entries. Highlight or color-code values to easily identify trends. If readings consistently exceed 140/90 mmHg, consult your GP. The chart also helps track improvements over time, guiding lifestyle adjustments or further medical evaluation. Regular interpretation empowers individuals to manage their health proactively and understand when to seek professional advice.

Benefits of Using the NHS Blood Pressure Chart
- Identifies hypertension early, enabling timely intervention to prevent strokes and heart disease.
- Tracks changes in blood pressure over time, helping monitor treatment effectiveness.
- Encourages proactive health management through regular monitoring and lifestyle adjustments.
- Supports better communication with healthcare providers using clear, recorded data.
- Available in PDF format, making it easy to use and share with medical professionals.
4.1 Early Detection of Hypertension
The NHS Blood Pressure Chart plays a crucial role in the early detection of hypertension by providing a clear and organized way to track blood pressure readings. Regular monitoring allows individuals to identify elevated or high blood pressure levels before they become a serious health concern. Early detection is vital as it enables timely lifestyle changes or medical interventions to prevent complications such as strokes and heart disease. The chart’s simplicity and accessibility make it an effective tool for promoting proactive health management, ensuring individuals can take control of their cardiovascular well-being with accurate and consistent data.
4.2 Tracking Progress Over Time
Tracking blood pressure over time is essential for understanding trends and the effectiveness of lifestyle changes or treatments. The NHS Blood Pressure Chart allows individuals to document their readings consistently, making it easier to identify patterns and fluctuations. By monitoring changes, users can assess how modifications to diet, exercise, or medication impact their blood pressure. This longitudinal tracking not only empowers individuals to take proactive steps in managing their health but also provides valuable data for healthcare providers to make informed decisions. Regular monitoring and documentation are key to maintaining long-term cardiovascular health and preventing potential complications.
Where to Get Blood Pressure Checks
Blood pressure checks are widely available through NHS services, community locations, pharmacies, and GP clinics, making it easier for individuals to monitor their health regularly.
5.1 NHS Services and Community Locations
The NHS offers blood pressure checks through various community locations, including GP surgeries, pharmacies, and now even non-traditional settings like barber shops, supermarkets, and places of worship. This expansion aims to increase accessibility and encourage early detection of hypertension. Many high-street pharmacies have significantly increased the number of blood pressure checks they provide, with over 149,000 checks delivered to individuals over 40 in May 2023. These community-based services are part of a broader initiative to prevent strokes and heart attacks by identifying and managing high blood pressure earlier. This approach makes blood pressure monitoring more convenient and widespread.
5.2 Role of Pharmacies and GP Clinics
Pharmacies and GP clinics play a vital role in providing accessible blood pressure checks. Many high-street pharmacies now offer this service, with over 149,000 checks delivered to individuals over 40 in May 2023. These checks are often free and confidential, making them an convenient option for monitoring blood pressure. GP clinics provide more in-depth assessments and personalized advice, helping patients manage hypertension effectively. Both settings ensure early detection and tailored care, emphasizing the importance of regular monitoring for better health outcomes.
Managing High Blood Pressure
Managing high blood pressure involves lifestyle changes, regular monitoring, and professional guidance to maintain healthy levels and reduce cardiovascular risks effectively.
6.1 Lifestyle Changes for Blood Pressure Control
Lifestyle changes are a cornerstone of managing high blood pressure. Adopting a balanced diet, such as the DASH diet, which emphasizes fruits, vegetables, and low-fat dairy, can significantly lower blood pressure. Regular physical activity, like brisk walking or cycling for at least 30 minutes most days, also helps reduce hypertension. Limiting alcohol intake, quitting smoking, and reducing sodium consumption are additional key steps. Managing stress through relaxation techniques and ensuring adequate sleep further supports blood pressure control. Monitoring progress and consulting with healthcare professionals can tailor these changes to individual needs, promoting long-term cardiovascular health.
6.2 When to Seek Medical Advice
If your blood pressure readings consistently exceed 140/90 mmHg or if you experience symptoms like dizziness, chest pain, or shortness of breath, seek medical advice promptly. The NHS recommends consulting a GP if you suspect low blood pressure or if readings are significantly higher than usual. Regular checks at pharmacies or clinics can provide early detection and guidance. Don’t ignore severe symptoms, as they may indicate underlying health issues. Early intervention can prevent complications like strokes or heart attacks, emphasizing the importance of monitoring and professional consultation for effective blood pressure management.
The Impact of High Blood Pressure
High blood pressure significantly increases the risk of stroke and heart disease. Around 1 in 4 UK adults have hypertension, often undiagnosed. The NHS is expanding community and pharmacy blood pressure checks to prevent these conditions.
7.1 Link to Stroke and Heart Disease
High blood pressure is a leading cause of stroke and heart disease. It damages blood vessels and the heart, increasing the risk of these conditions. Uncontrolled hypertension can lead to arterial stiffening, cardiac hypertrophy, and atherosclerosis, all of which contribute to stroke and heart disease. The NHS emphasizes that early detection and management of high blood pressure can significantly reduce these risks. Regular monitoring using tools like the NHS Blood Pressure Chart helps identify hypertension early, enabling timely interventions to prevent stroke and heart disease. This underscores the importance of proactive blood pressure management for overall cardiovascular health.
7.2 Statistics on High Blood Pressure in the UK
NHS data indicates that approximately 1 in 4 adults in the UK lives with high blood pressure, many of whom are unaware of their condition. Regional disparities exist, with the South West having the highest prevalence. Untreated hypertension contributes significantly to strokes and heart attacks, with thousands of lives potentially saved through better management. The NHS has expanded blood pressure checks in community locations like pharmacies, supermarkets, and places of worship to address this issue. High street pharmacies alone conducted over 149,000 checks in May 2023, more than double the previous year, highlighting growing efforts to tackle this health concern.
Additional Resources and Support
The NHS offers various resources, including downloadable PDF guides, community programs, and publications, to help manage blood pressure. Local pharmacies and GP clinics also provide support.
8.1 NHS Guidelines and Publications
NHS guidelines and publications provide comprehensive information on managing blood pressure, including the use of the blood pressure chart. These resources, available in PDF format, offer evidence-based recommendations for monitoring and controlling hypertension. They emphasize the importance of regular checks, lifestyle modifications, and when to seek medical advice. Additionally, the NHS publishes materials on the DASH diet and other strategies to lower blood pressure, ensuring individuals have access to reliable and actionable information. These guidelines are regularly updated to reflect the latest research and clinical practices.
8.2 Community Programs for Blood Pressure Management
The NHS has introduced community programs to improve blood pressure management, making checks more accessible in local settings like barber shops, supermarkets, and places of worship. These initiatives aim to detect hypertension early and encourage individuals to adopt healthier lifestyles. Pharmacies have also expanded their role, delivering over 149,000 blood pressure checks to individuals over 40 in 2023, more than double the previous year. Such programs highlight the NHS’s commitment to preventing strokes and heart attacks through proactive health monitoring and education, ensuring communities can manage their blood pressure effectively.
The NHS Blood Pressure Chart is a vital resource for monitoring and managing blood pressure effectively, promoting early detection of hypertension and enhancing overall cardiovascular health outcomes.
9;1 Summary of Key Points
The NHS Blood Pressure Chart is a valuable tool for monitoring and managing blood pressure, aiding in early hypertension detection and improving cardiovascular health. It allows individuals to track their readings, identify patterns, and share data with healthcare providers for informed decisions. Regular use of the chart encourages proactive health management, helping to prevent complications like strokes and heart diseases. By providing a clear and organized format, the chart empowers users to take control of their blood pressure effectively. Consistent monitoring and recording are essential for maintaining long-term health and well-being;
9.2 Encouragement to Use the NHS Blood Pressure Chart
Using the NHS Blood Pressure Chart is a simple yet effective way to take control of your cardiovascular health. Regular monitoring helps identify potential issues early, enabling timely interventions to prevent strokes and heart diseases. The chart’s user-friendly format makes it easy to track progress and share data with healthcare providers, fostering better decision-making. By incorporating this tool into your daily routine, you can empower yourself to manage hypertension proactively and maintain a healthier lifestyle. The NHS encourages everyone, especially those at risk, to utilize this resource for better blood pressure management and overall well-being.
References
Key sources include NHS publications, guidelines from the National Heart, Lung, and Blood Institute, and additional resources like the DASH diet for blood pressure management.
10.1 NHS Publications and Guidelines
NHS publications provide comprehensive guidance on blood pressure management, emphasizing the importance of regular monitoring and healthy lifestyle choices. The NHS Blood Pressure Chart, available as a PDF, is a key resource for tracking readings and understanding hypertension. These guidelines are supported by clinical evidence and are designed to help individuals and healthcare professionals identify and manage high blood pressure effectively; They also highlight the role of early detection in preventing complications like stroke and heart disease. NHS resources are regularly updated to reflect the latest research and recommendations, ensuring accurate and reliable information for public use.
10.2 Further Reading and Resources
For additional insights, explore resources like the DASH diet guide from the US Department of Health and Human Services, which offers strategies to lower blood pressure through dietary changes. Research studies, such as the Mendelian Randomization Study on blood pressure and age-related conditions, provide deeper scientific understanding. Community programs and NHS-backed initiatives also offer support for managing hypertension. These resources complement the NHS Blood Pressure Chart, ensuring a holistic approach to monitoring and controlling blood pressure effectively.